
Navigating Schoology in a language you don’t understand can be challenging, when managing assignments and deadlines. As a popular learning management system (LMS), Schoology offers multiple language options to support multilingual users. If English is not your primary language and you prefer navigating the tool in Spanish, French, or any other language, switching the language in Schoology is quick and easy. This guide will show you how to switch from default to your preferred language.
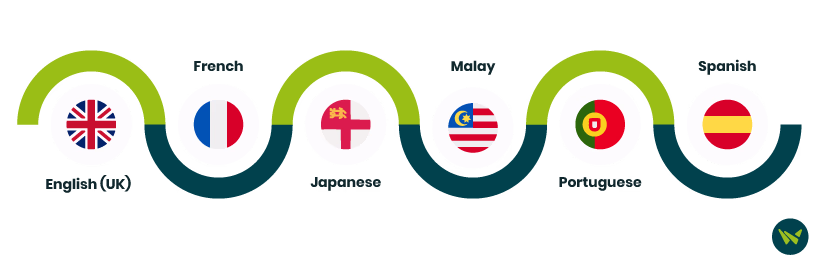
Schoology offers multiple language options to accommodate the language preferences of its global users. Common languages supported by Schoology include:
- English (UK)
- French
- Japanese
- Malay
- Portuguese
- Spanish
Switching languages in Schoology is as easy as a few clicks. Follow these steps to change your language settings:
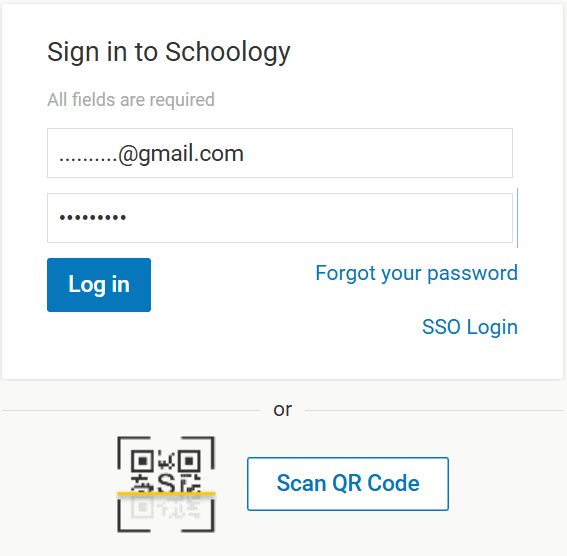
- Log in to your Schoology account by entering your login credentials
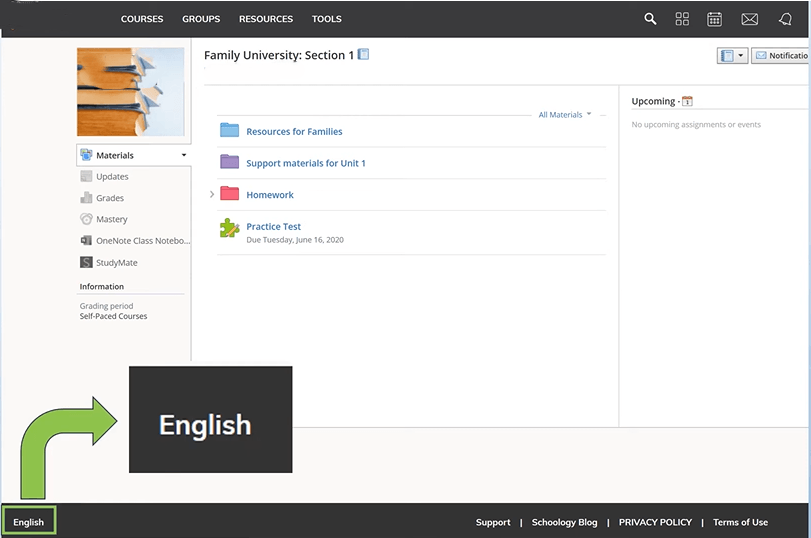
- When you are on the main page of the Schoology, scroll down to the bottom of the page
- Look for ‘English’ on the bottom left corner of the bar and click on it
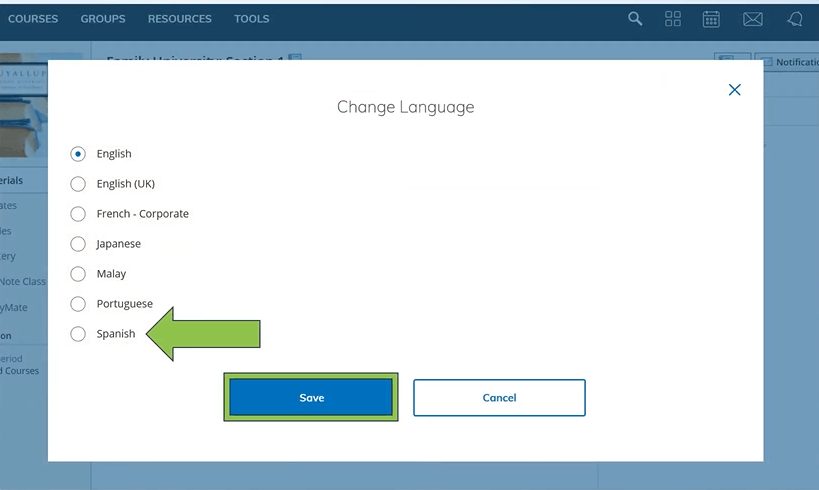
- After clicking ‘English’, a list of language options will appear on the screen
- Select your preferred language from the drop down
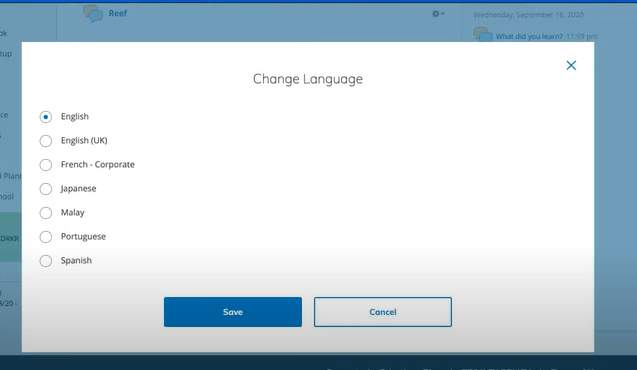
- Click ‘Save’ to save your language preferences
- Once you save your new language, refresh your Schoology page to apply those changes
- All content within Schoology, including menu bars, navigation panels, and interface text, will now appear in your selected language

Important Note: Changing Schoology language will not update your course content language. If you want to view course material in your preferred language, follow the guidelines below
While the platform’s interface language can be changed, the course content stays in the original language. However, you can use a browser-based translation tool to view course materials in your preferred language. Browser extensions provide additional translation options for many languages. Follow these simple steps to quickly enable a translation extension in your browser:
Download a translator extension for your selected browser, such as Google Translator for Google and Microsoft Translator for Microsoft
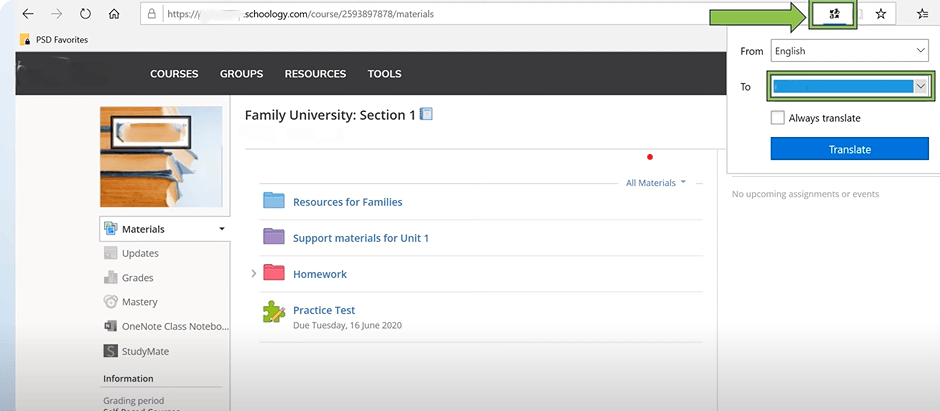
- Choose your desired language from the list of supported languages in the extension
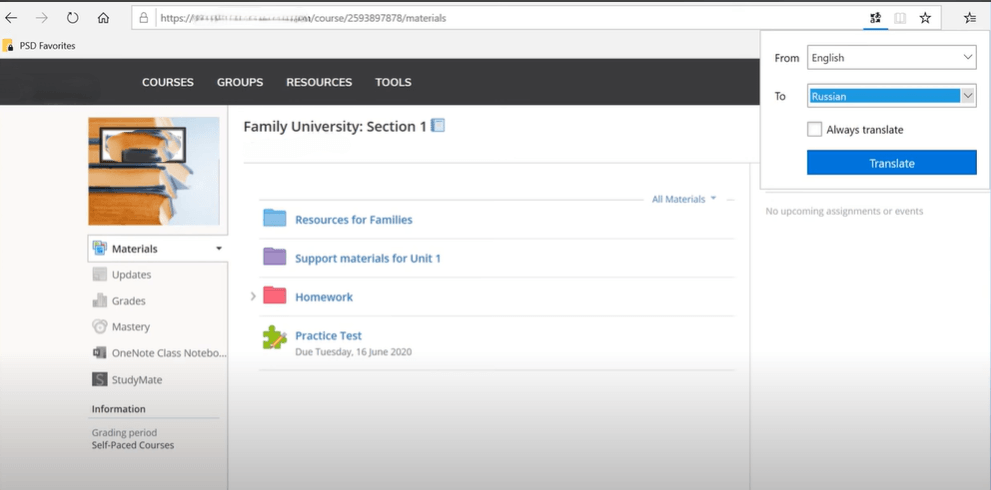
- After selecting the language, choose ‘Always Translate’ to automatically translate future pages
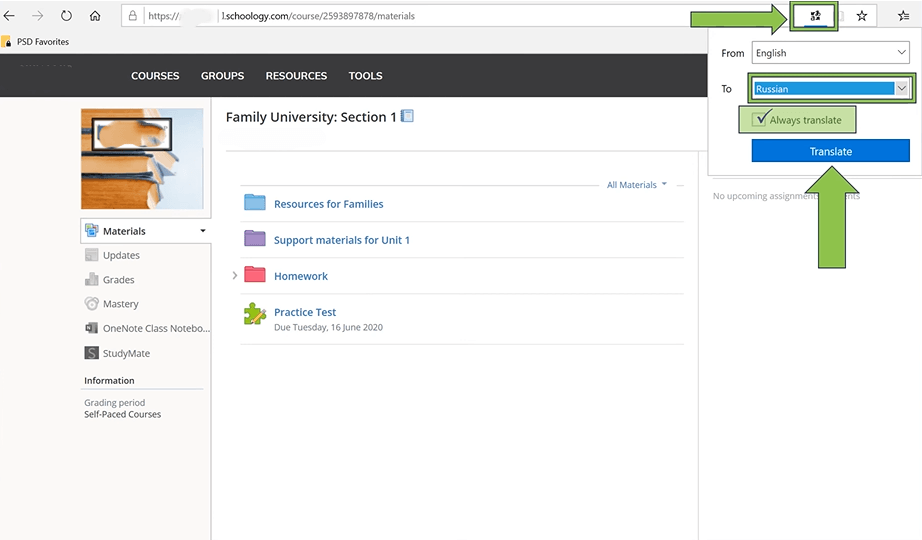
- Click on the ‘Translate’ button

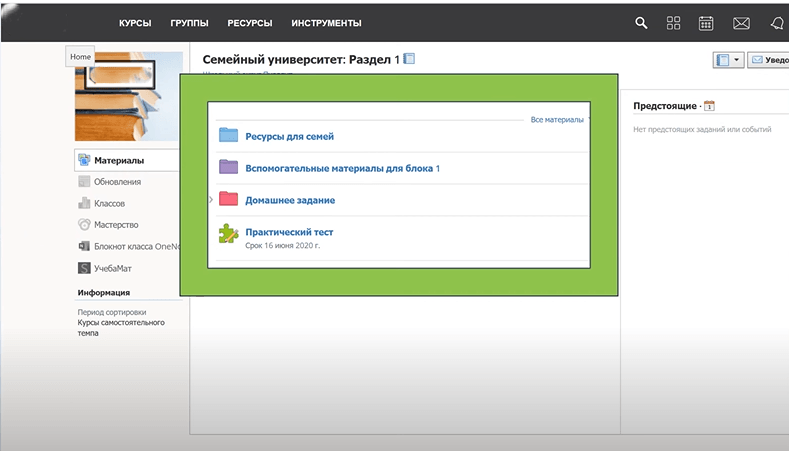
- Once you have selected ‘Translate’ using the browser extension, all the information on your Schoology page will be shown in the language you selected
Important Note: To switch the page back to English, click on your browser extension icon and then click on the ‘Show Original’ Button
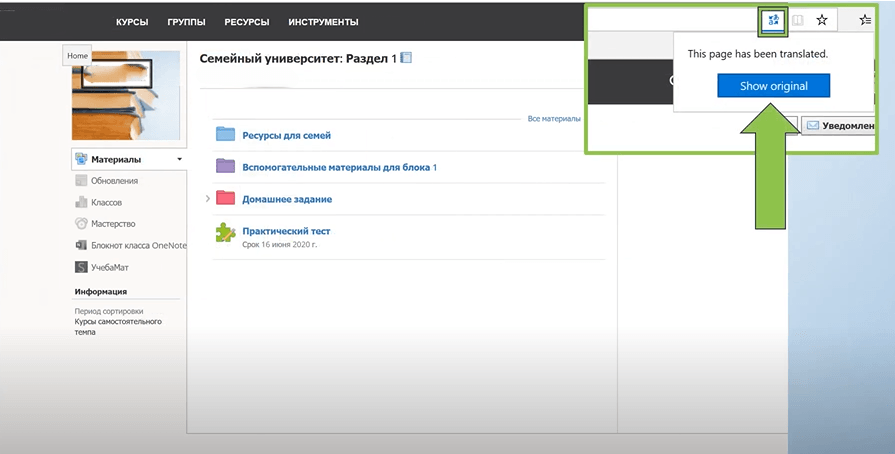
- Once you make this change, everything on the Schoology page will revert to the default language setting (English)
Changing the language in Schoology does not have to be complicated. By following the steps mentioned above, you can easily navigate and understand your Schoology content in the language that works best for you. Furthermore, if you face any problem in choosing your desired language, reach out to our expert team.