
![]()
Creating your own course on Schoology LMS doesn’t have to be complicated. Whether you’re an educator testing out new features or setting up your first digital classroom, this guide walks you through the process step by step. With simple instructions and helpful visuals, you’ll be able to build a course and start adding materials in just a few minutes. Let’s get started
Once you have logged in to your Schoology LMS account, follow these seven simple steps to create your course in Schoology:
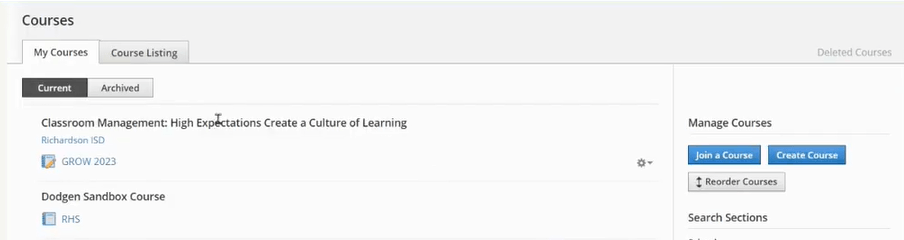
- Open Schoology and go to the ‘Courses’ tab:
- Look at the top-left corner of your dashboard
- Click on 'Courses'

2. Access 'My Courses':
- On the top-right of the drop-down that appears, click on 'My Courses'

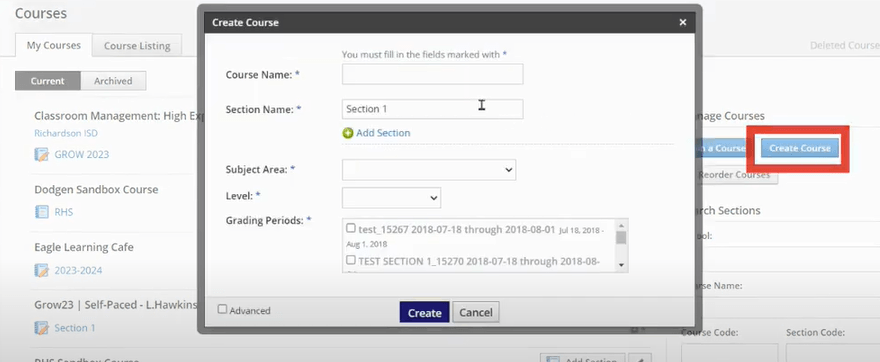
3. Click on 'Create Course':
- In the 'My Courses' area, tap the blue 'Create Course' button
4. Fill in the course details:
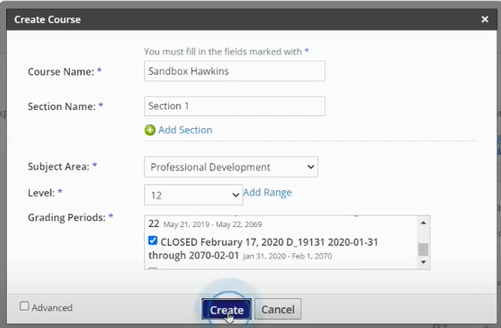
- Course Name: You can name it something like 'Sandbox Course' if you're just testing features or the actual name of your course
- Subject Area: Choose a relevant subject (e.g., Professional Development)
- Level: Pick any level (e.g., 12th Grade); this field is required
- Grading Period: Select any option that appears in black. This is required to proceed, but it doesn’t matter if you’re not syncing to external systems
5. Create the course:
- Click the blue 'Create' button at the bottom
6. Access your new course:
- Once done, you’ll be taken directly to your newly created course
- Alternatively, go back to the Courses tab, and you’ll see your newly created course listed there as well
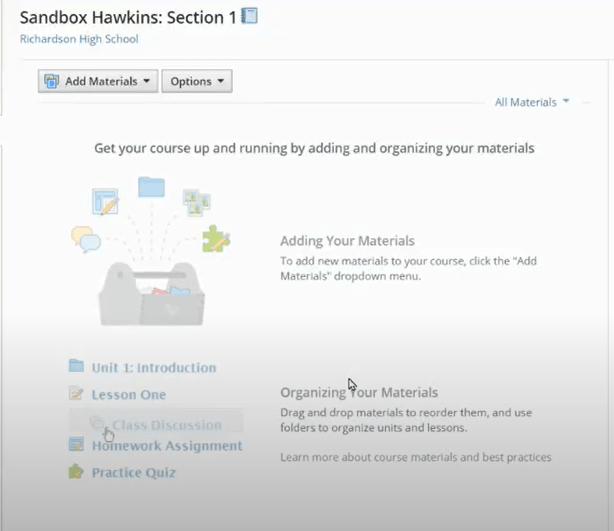
7. Start adding course materials:
- You’ll land on the ‘Materials’ page, where you can add assignments, discussions, files, and folders to your course
- You also have access to other sections like ‘Updates’, ‘Gradebook’, ‘Grade Setup’, ‘Badges’, and ‘Members’ from the left-hand menu
- You can choose to organize your course content right away or come back later to build things out at your own pace

And there you have it. By following these simple, straightforward steps, you cannot only create your Schoology course but can also add material, gradebooks, and grade setup.