
Google Slides is a powerful tool for creating visually engaging, clickable content. But to get the most out of it within the Schoology LMS, it’s important to embed it the right way. A simple misstep, like uploading the file the wrong way, can lead to distorted layouts, broken links, and mismatched fonts.
That’s frustrating for teachers trying to deliver clean, interactive lesson plans—and for admins working to keep things consistent across courses. This guide walks you through the right steps to preserve your formatting and give students seamless learning experience.
Embedding Google Slides into Schoology doesn't have to be complicated. This step-by-step guide, with clear screenshots, will walk you through the entire process. Whether you're a teacher setting up lesson plans or admin organizing course content, this visual guide will make it easy to follow along and get it right the first time.
Step 1: Connect ‘Google Drive’ to Schoology login page
- Click on the ‘Resources’ tab (top menu)
- On the left sidebar, scroll to the bottom and click ‘Apps’ or ‘Applications’
- Select Google Drive Resource App

- Click the ‘Options’ drop-down > ‘Account Settings’
- Connect your Google account (use your school email) and click ‘Allow’

Step 2: Import Your Google Slides Inside the Google Drive Resource App, browse and find the Slides file you want to embed
- Click on the respective file, then click ‘Import’ > ‘Import File’
- Choose ‘Add to My Resources’ and select a location (e.g., Home or a specific folder)
- Schoology will now save a copy of your file in your ‘Resources’ section

IMPORTANT NOTE: Avoid Uploading as a File (Formatting Issue)
- If you upload the file directly to a course, Schoology may distort the formatting, break links, or misalign fonts
- Don't do this. Instead, embed it via a ‘Page’
Step 3: Embed the Slides via a ‘Page’. Go to your course and click into the folder where you want the slides to appear (e.g., ‘Week 1’)

- Click ‘Add Materials’ > ‘Add Page’
- Give your page a title (e.g., ‘Week 1 Lesson Plans’)

Step 4: Insert the Google Slides into the Page Inside the Page editor
- Click ‘Insert Content’ > ‘Google Drive Resource App’
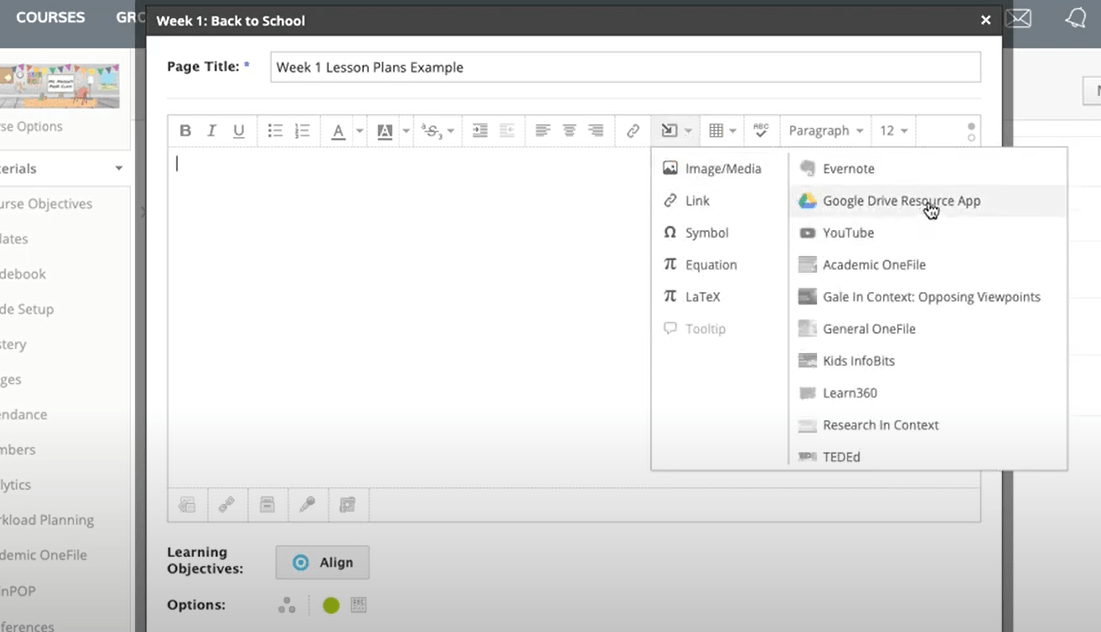
- Browse to your Slides file
- Click ‘Import’ > ‘Import Embed’

- Wait for the preview to load (can take a few seconds)
- Resize the embed window if needed
- Optionally, add extra text or links (e.g., a Choice Board link)
Step 5: Finalize and publish, click ‘Create’ to save the page
- The embedded Google Slides will now appear directly in your course, fully functional with clickable links and preserved formatting

Now that you've successfully embedded your Google Slides into Schoology, you're all set to deliver engaging, interactive content to your students while retaining original format. If you encounter any issues with formatting or links, double-check the embedding process to ensure everything was done correctly. If the problem persists, try clearing your browser cache or reach out to Schoology support for further assistance. With this guide, you should have a smooth and hassle-free experience every time