

Setting up a course in Schoology can feel overwhelming, especially if you are unsure where to start. You want your students to have a seamless learning experience. However, without a well-structured course, things can quickly become confusing. Missing materials, disorganized content, and difficulty navigating the platform can often lead to frustration for both educators and learners. The good news? Adding a course in Schoology is easier than you think.
This guide will walk you through the process of creating a course in Schoology LMS, ensuring you can structure your content effectively and enhance student engagement.
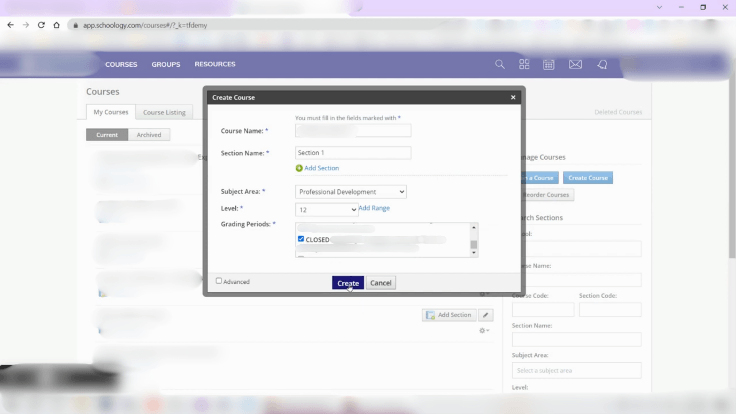
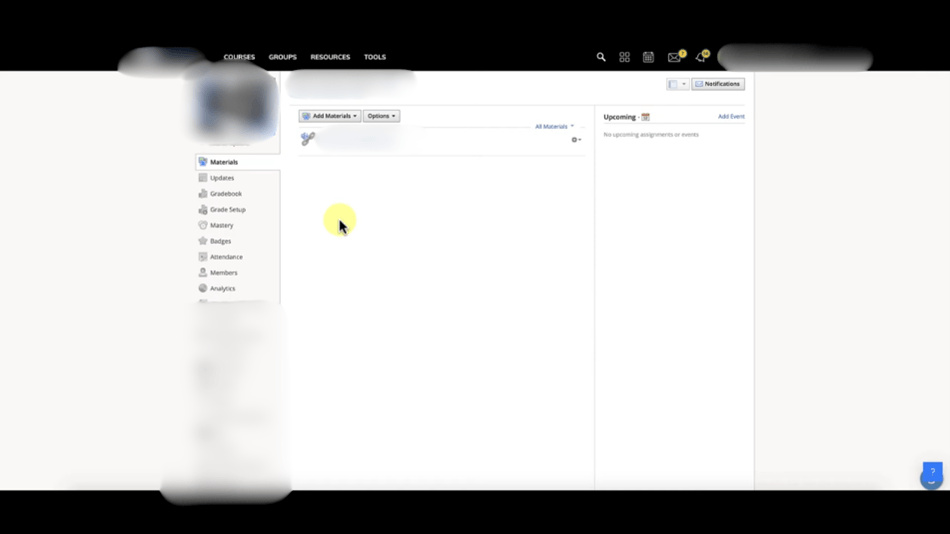
Creating a course in Schoology is a straightforward process that allows educators to organize their lessons, assignments, and resources in one place. Follow these step-by-step instructions to create a course and customize it to fit your teaching needs:

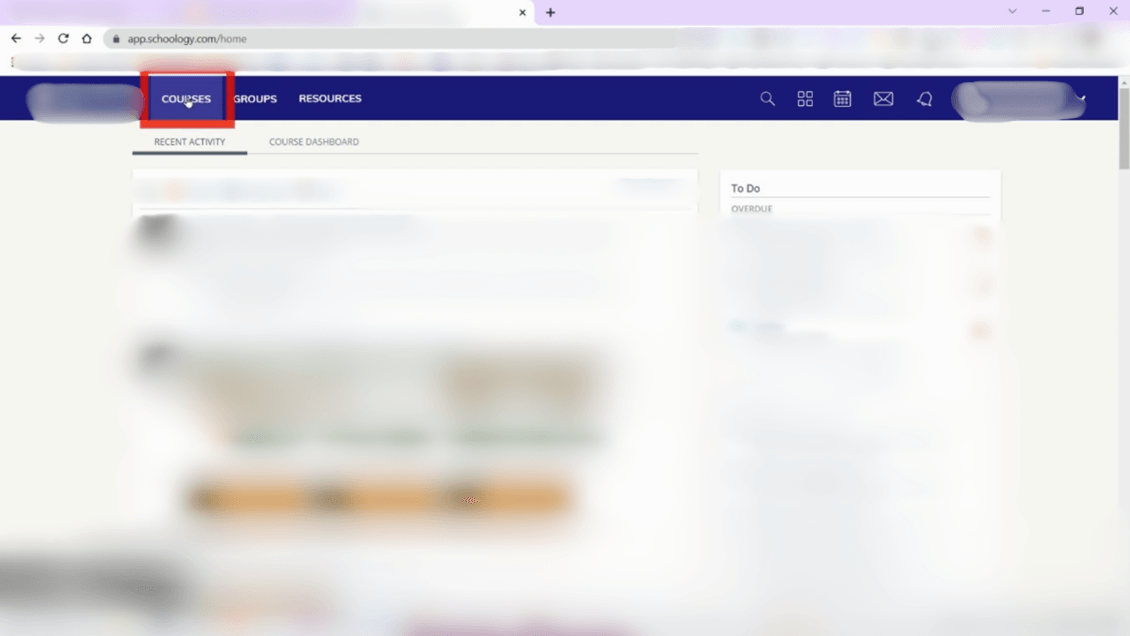
- Go to ‘Courses’ on the top menu
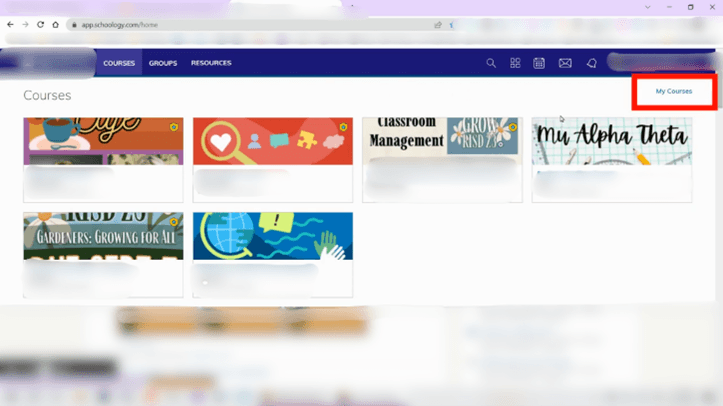
- Click ‘My Courses’ and press the ‘Create Course’ button on the center right-hand side of your screen
- A dialogue box will open and you must fill out the details:
- Enter ‘Course Name’
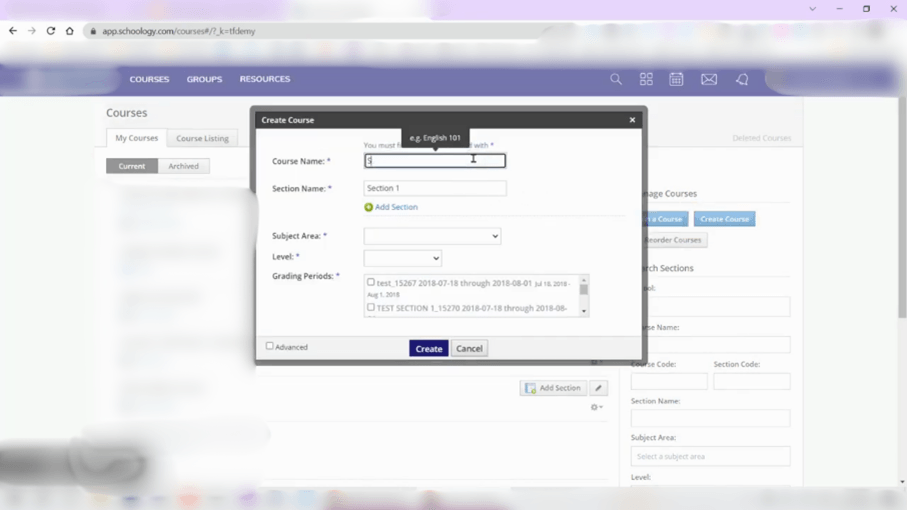
- Choose ‘Subject Area’

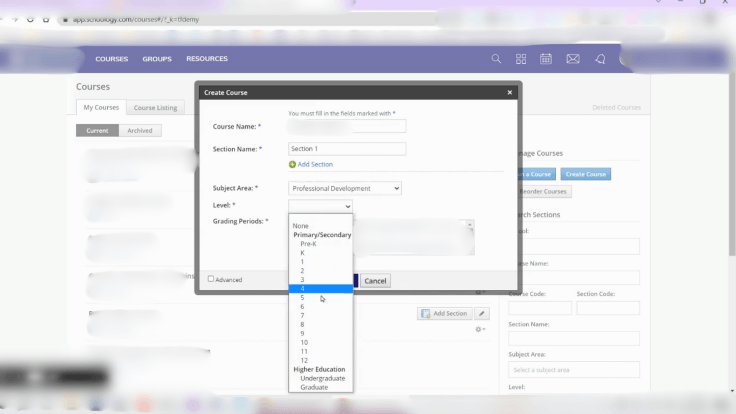
- Select ‘Level’
- ‘Grading Period’
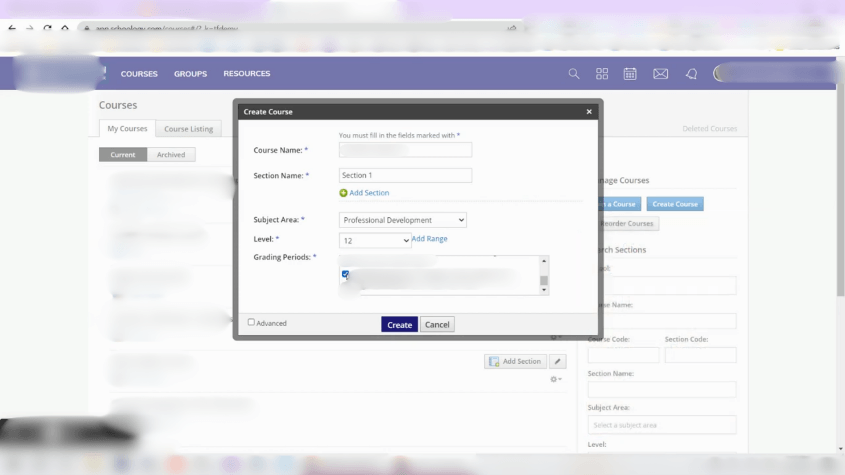
- Click on ‘Create’
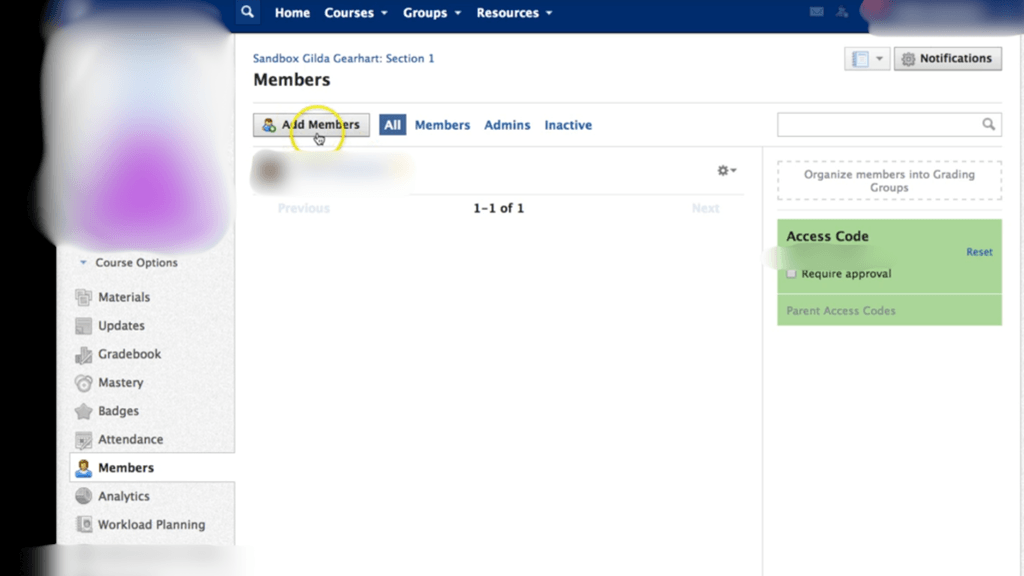
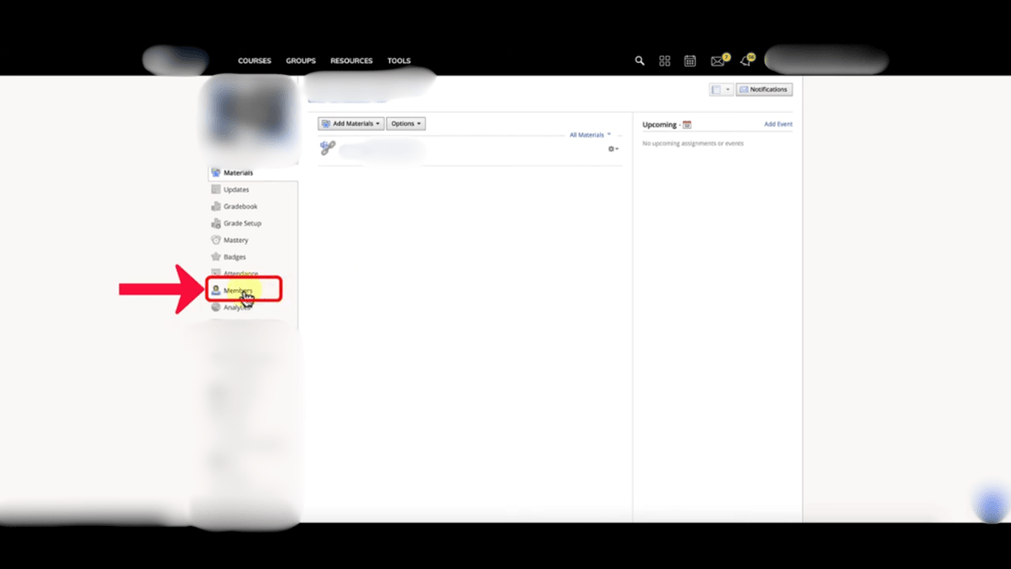
If you followed Step 1, you must be on the course page. In case you are not, go to the ‘Course’ from the main Schoology menu and choose the course card from the list.
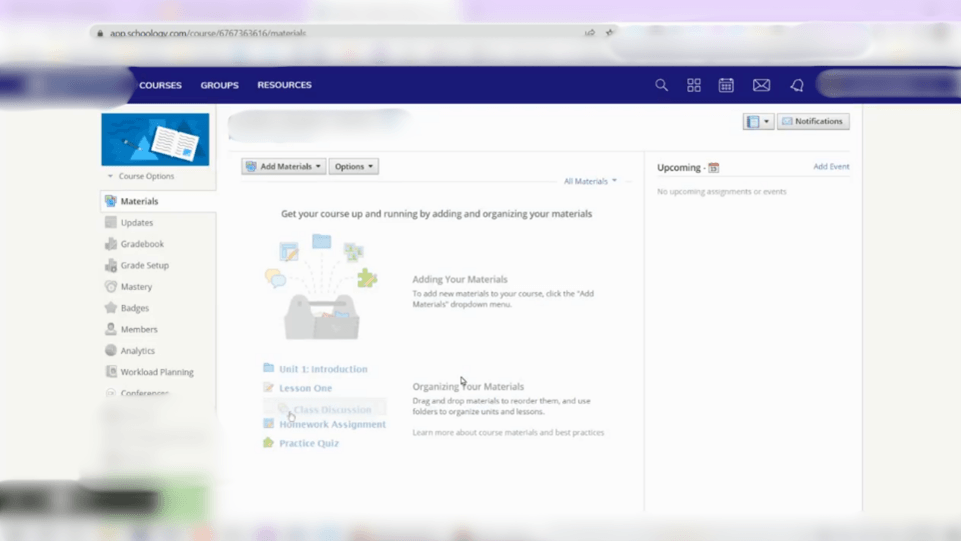
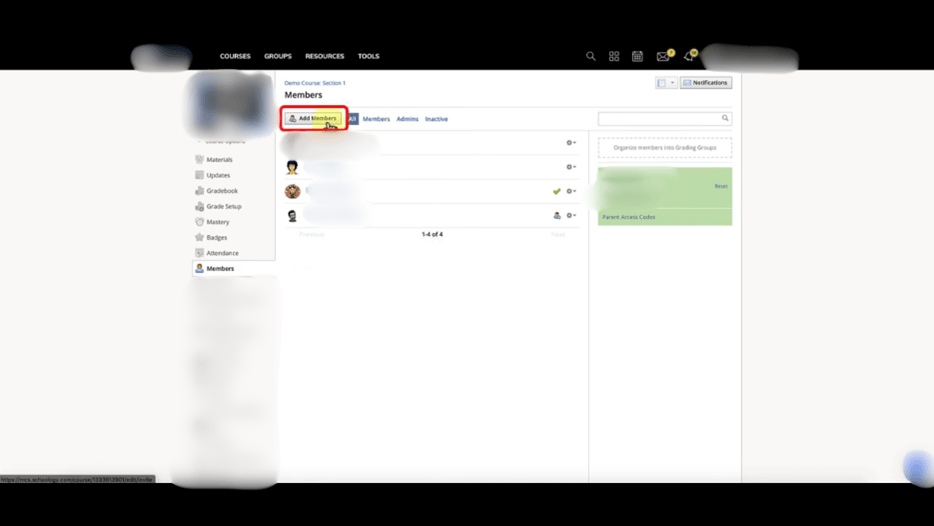
- Click on the ‘Members’ link from the side menu
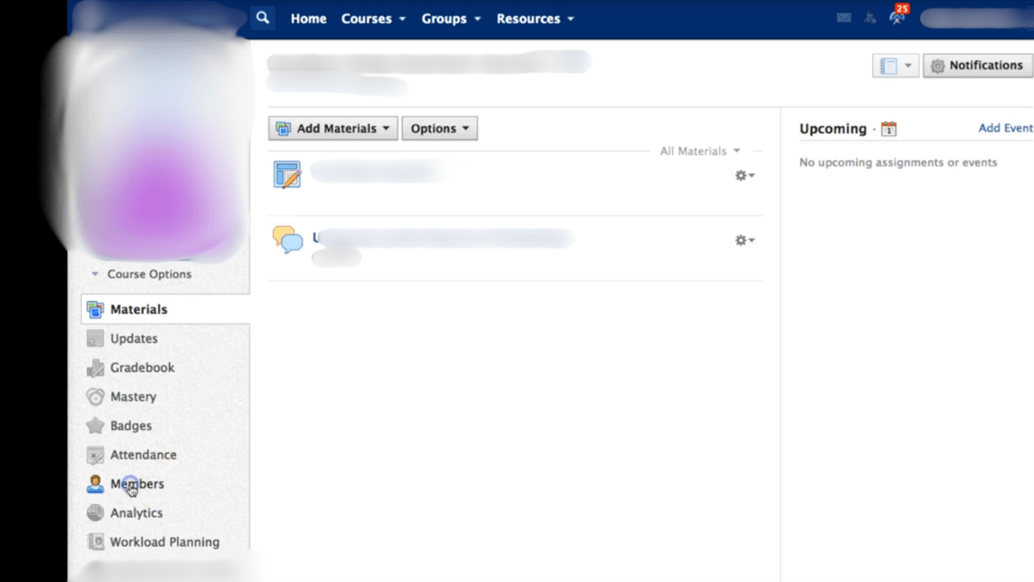
- And click on the ‘Add Members’ button
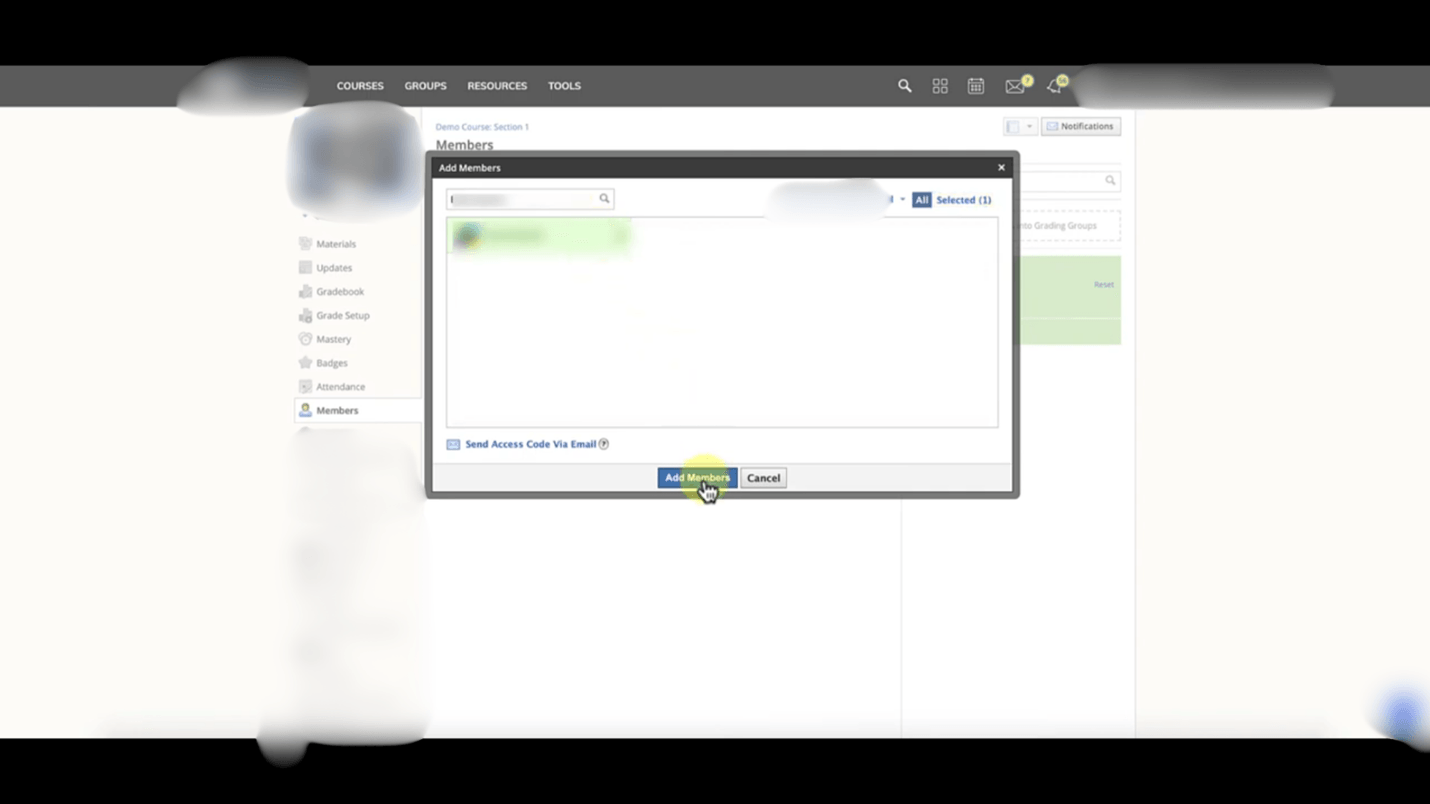
- A pop-up window will open where all the members will be listed, you can choose the staff members you wish to add to the course
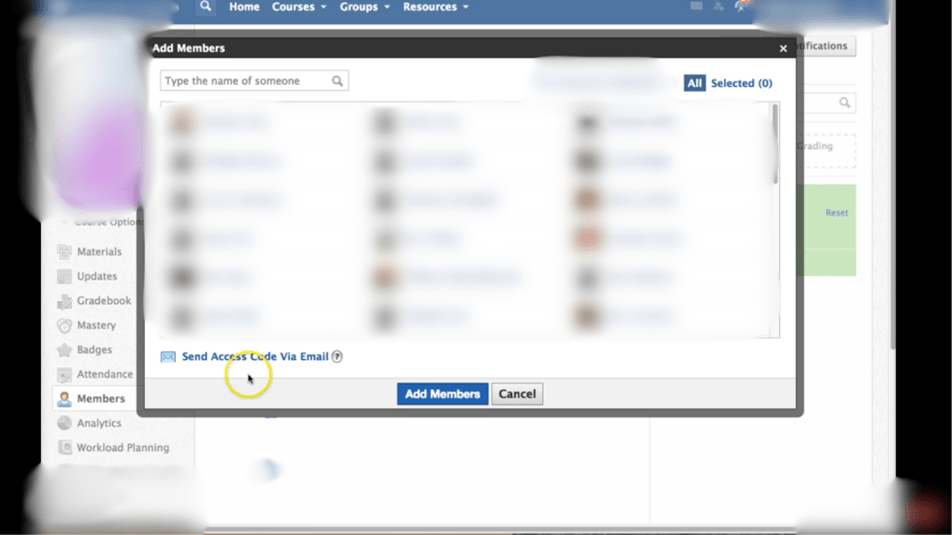
- Click ‘Add Members’ button

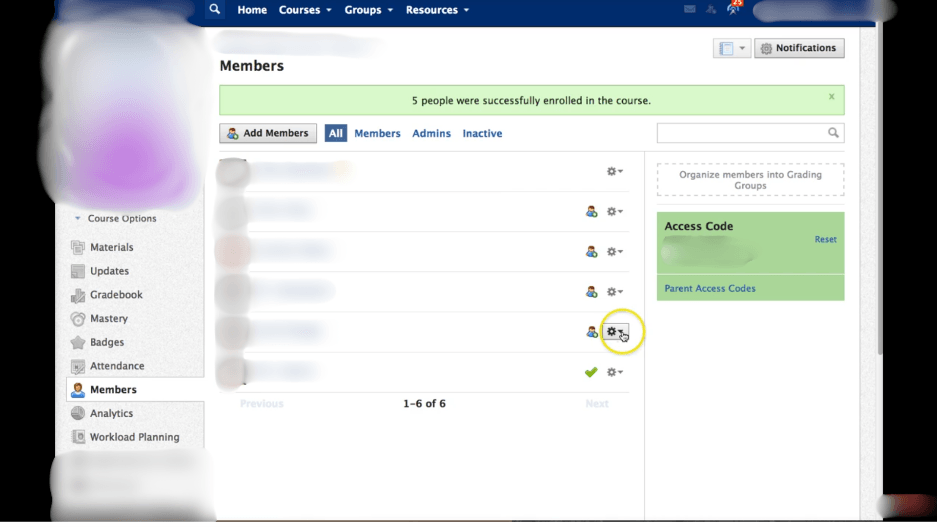
- Once you have added the members, you need to click on the ‘Settings’ icon in their row
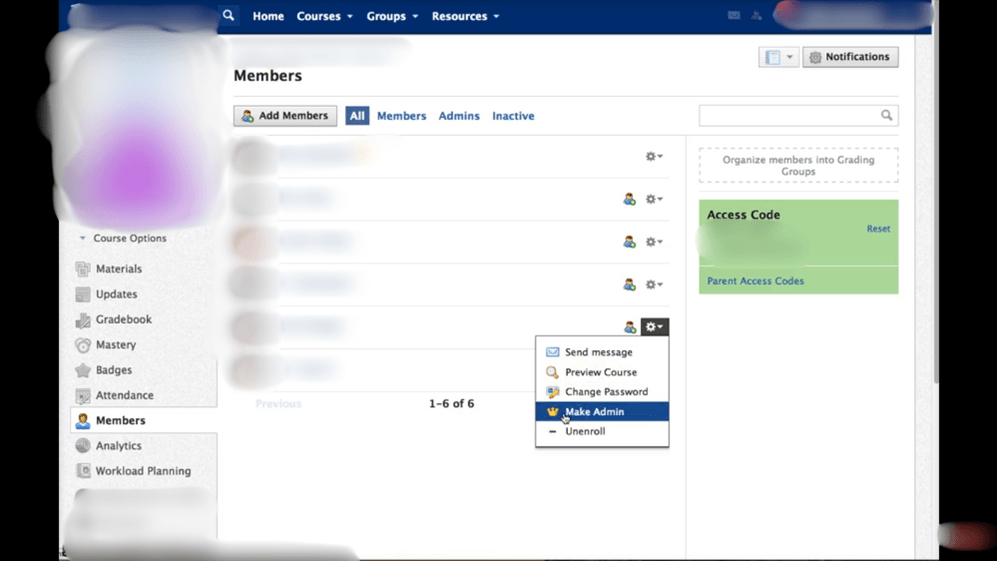
- Choose ‘Make Admin’ from the drop-down menu
If you followed Step 2, you must be on the course page. In case you are not, go to the ‘Course’ from the main Schoology menu and choose the course card from the list.
- Go to the ‘Members’ link from the side menu and click on the ‘Add Members’ button
- From the list, select all the students you want to add to the course
- Click on the ‘Add Members’ button
You have to follow this step once a school year. For this step, you need to have Schoology Admin rights; if not, then ask someone who has these permissions.
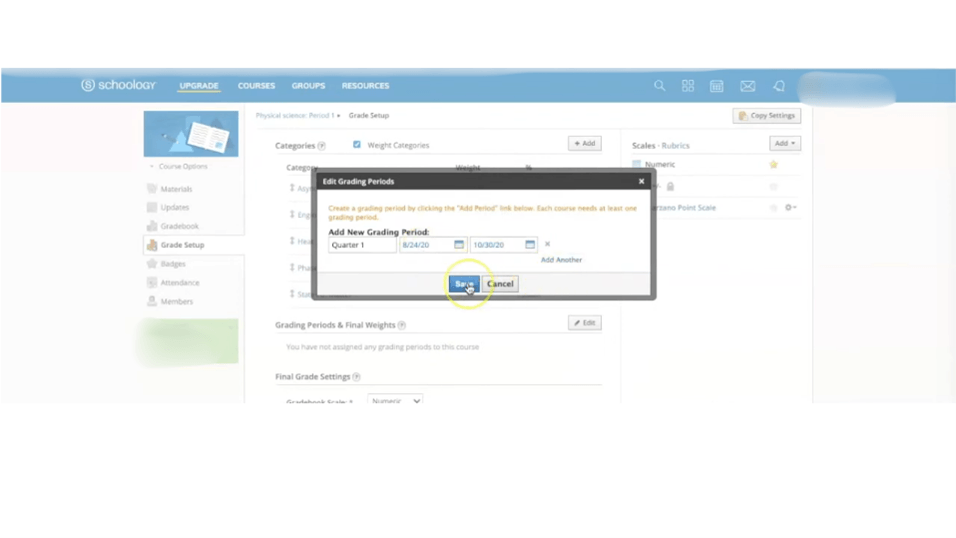
- Go to ‘Tools’ from the main menu and click on ‘School Management’
- Choose ‘Grade Settings’ from the sidebar
- Click on ‘+Add Grading Period’ that must be on the right-hand side of your screen
- A dialogue box will open, and in that, you need to add the title of the grading period
- Select two dates that are far in the future. We would recommend selecting dates that are two school years ahead of time
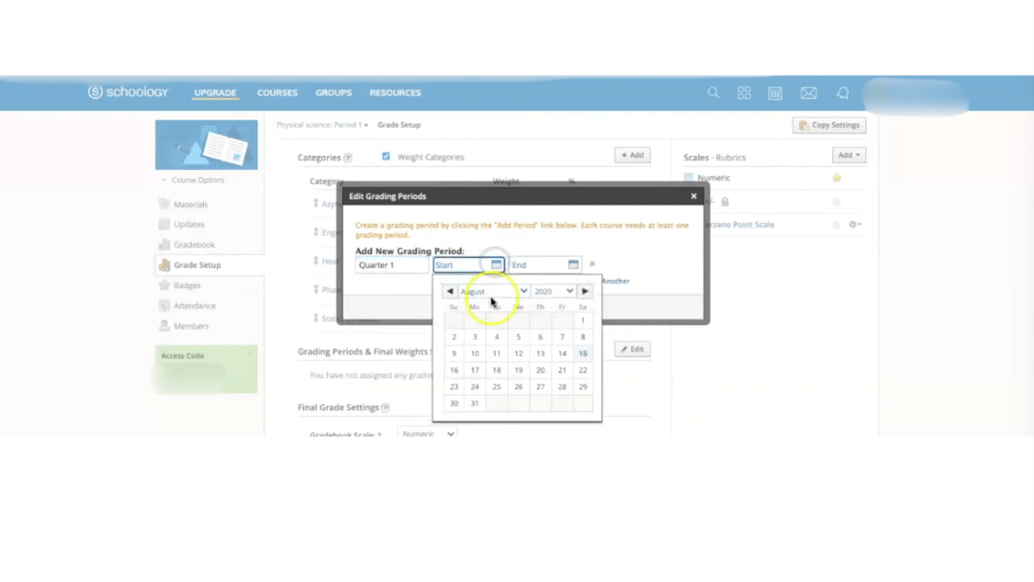
- Click the ‘Add Period’ to save it
- Again, choose ‘Tools’ from the main menu and go to ‘User Management’
- Select ‘Permissions’ from the side menu and scroll down to the ‘Courses’ section
- Make sure ‘View Upcoming Courses’ is unchecked for the student users
- Scroll down to the bottom of the page and press ‘Save Permissions’
In the end, creating a course in Schoology doesn’t have to be complicated. By following these steps, you can set up a well-structured course, add members and students, and even customize grading periods for better organization. If you need any help, reach out to our team of experts.