Schoology is a powerful learning management system (LMS) that helps educators and students streamline coursework, assignments, and collaboration. In order to make resource sharing even easier, the platform allows you to integrate Google Drive, enabling seamless access to your documents, presentations, and other materials right from your account.
To add materials from Google Drive, you must connect your school or admin account to your Schoology account.
In this blog, we will guide you through the step-by-step process of linking Google Drive with Schoology.
Integrating Google Drive with Schoology allows you to access and share your files without the hassle of manual uploads. Once connected, you can attach Google Docs, Slides, and Sheets directly to assignments, discussions, and course materials. Follow these steps to connect your Google Drive to Schoology:
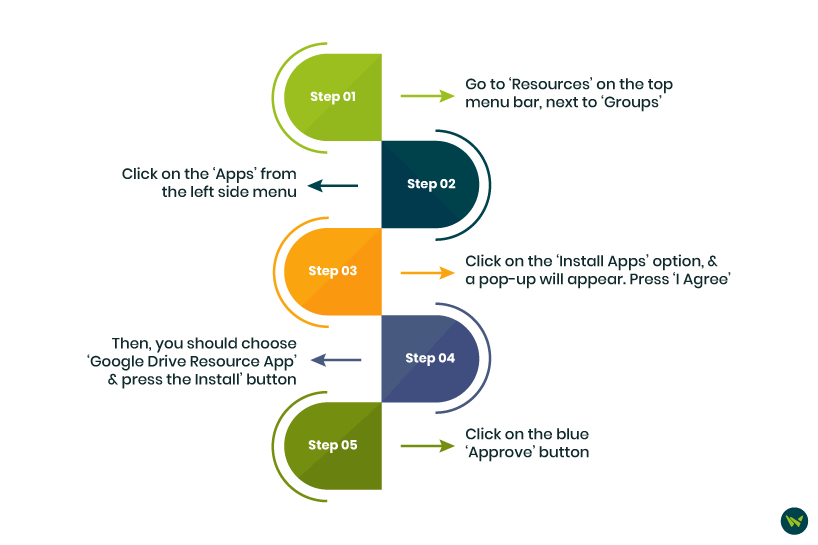
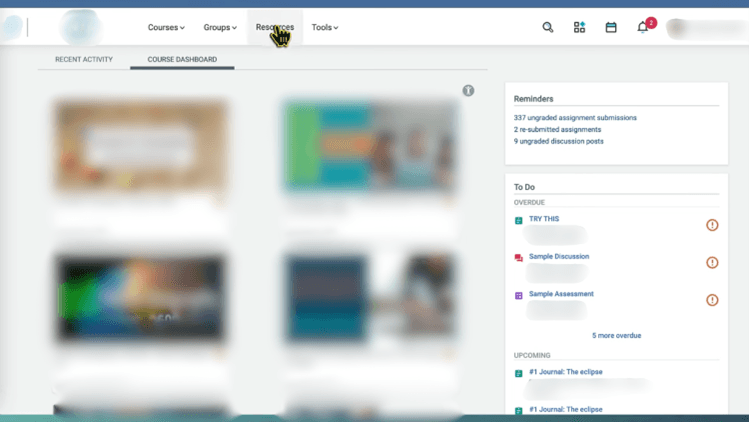
- Go to ‘Resources’ on the top menu bar, next to ‘Groups’
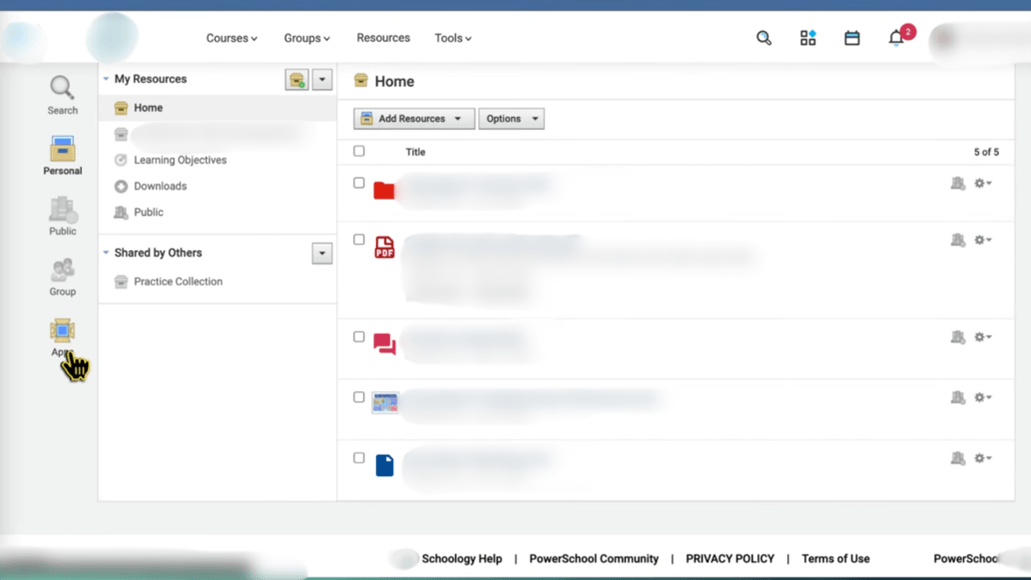
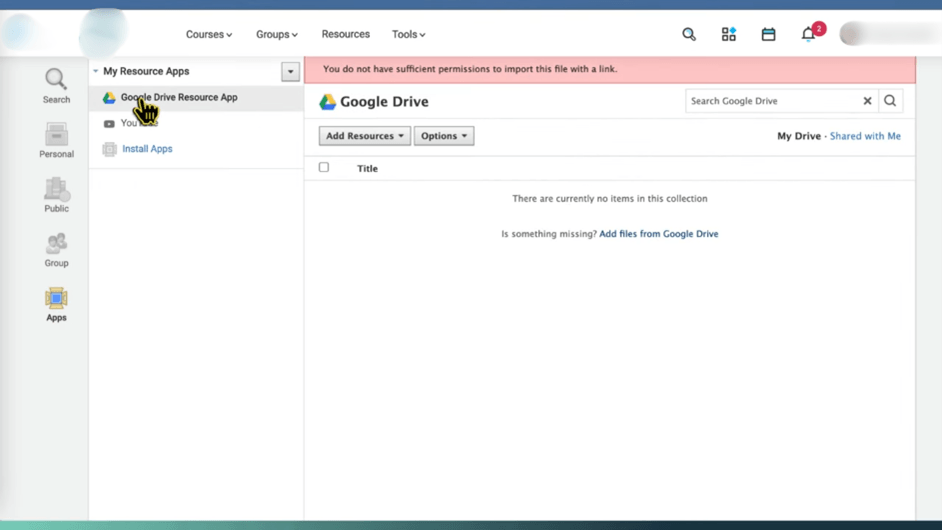
- Click on the ‘Apps’ from the left side menu
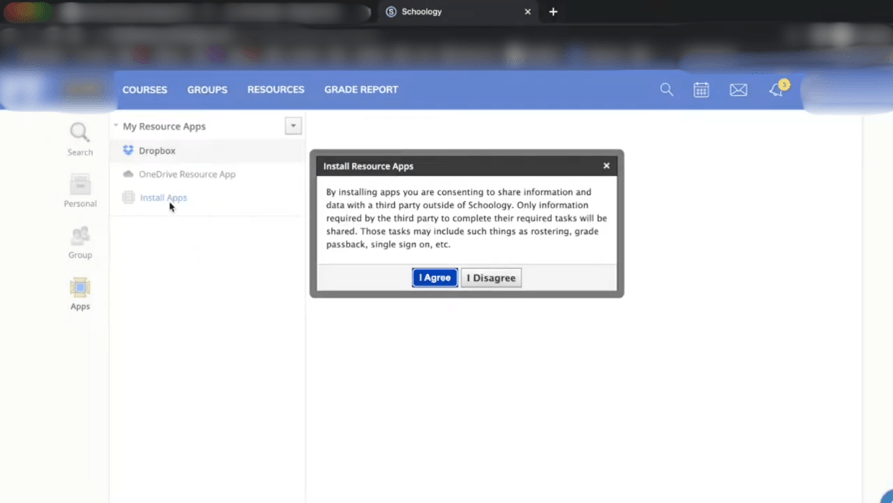
- Click on the ‘Install Apps’ option, and a pop-up will appear. Press ‘I Agree’

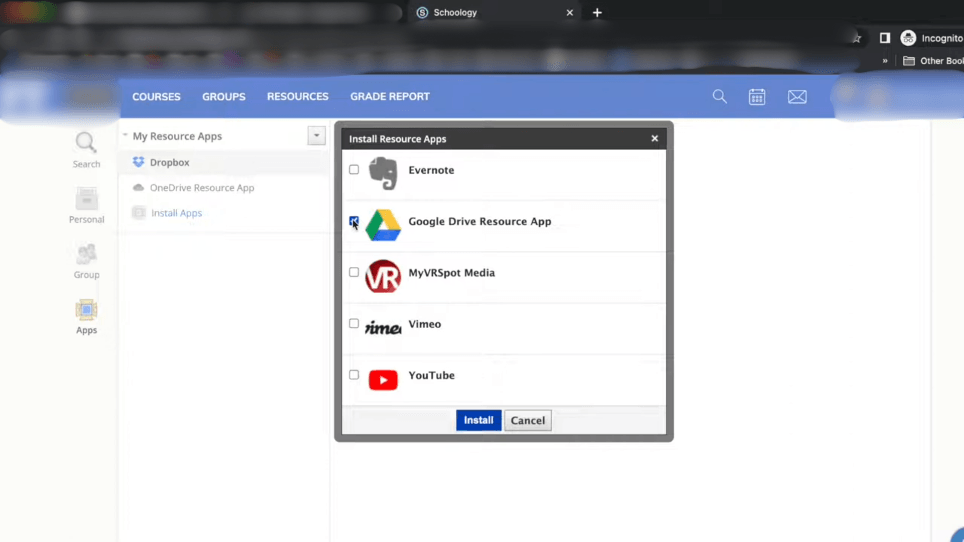
- Then, you should choose ‘Google Drive Resource App’ and press the ‘Install’ button
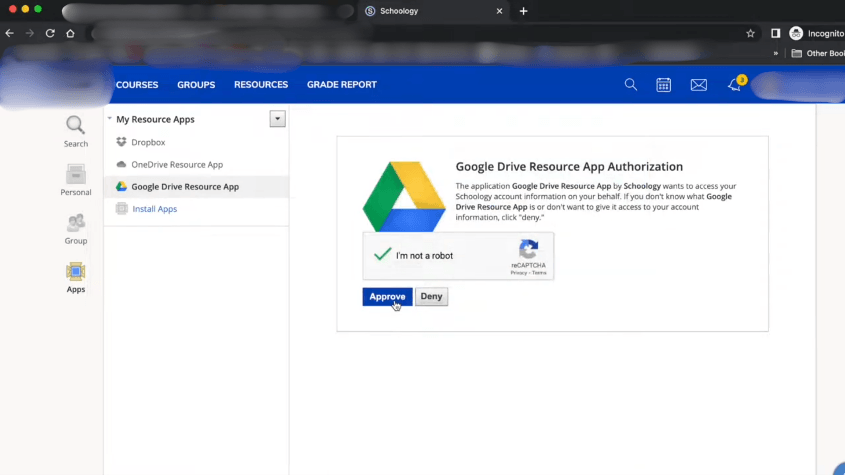
- Click on the blue ‘Approve’ button
In case you have already installed the Google Drive Resource App:
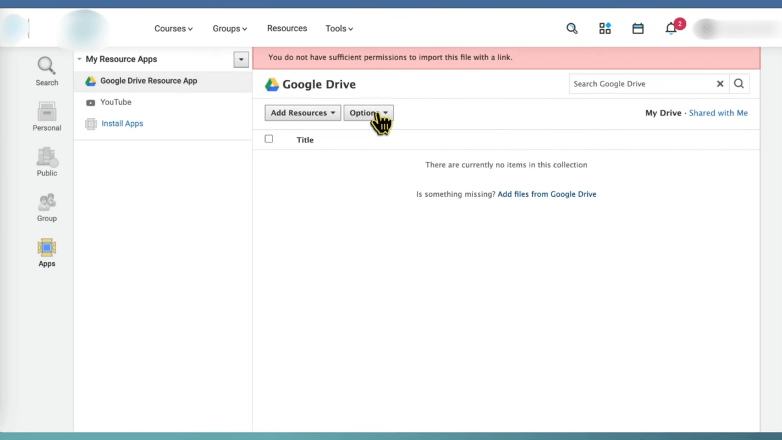
- You should choose ‘Google Drive Resource App’ from the list
- Press the ‘Options’ menu
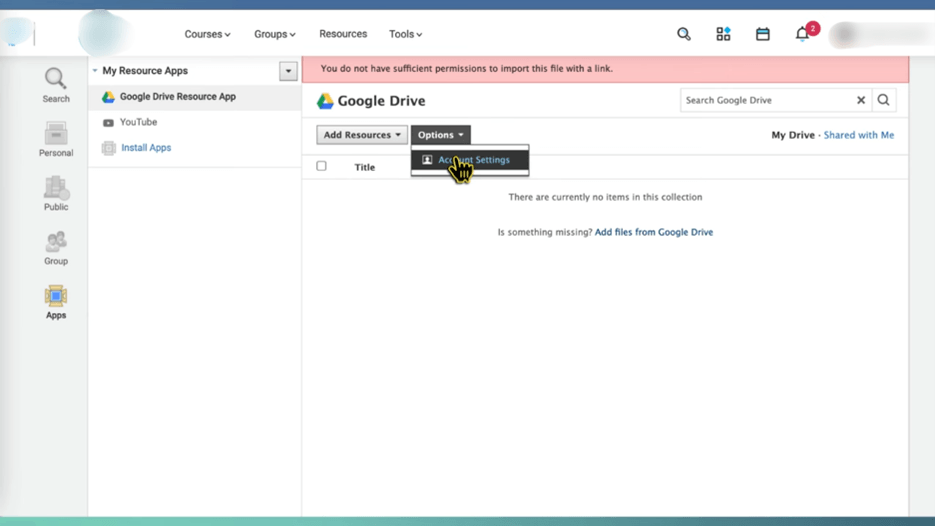
- Choose ‘Account Settings’
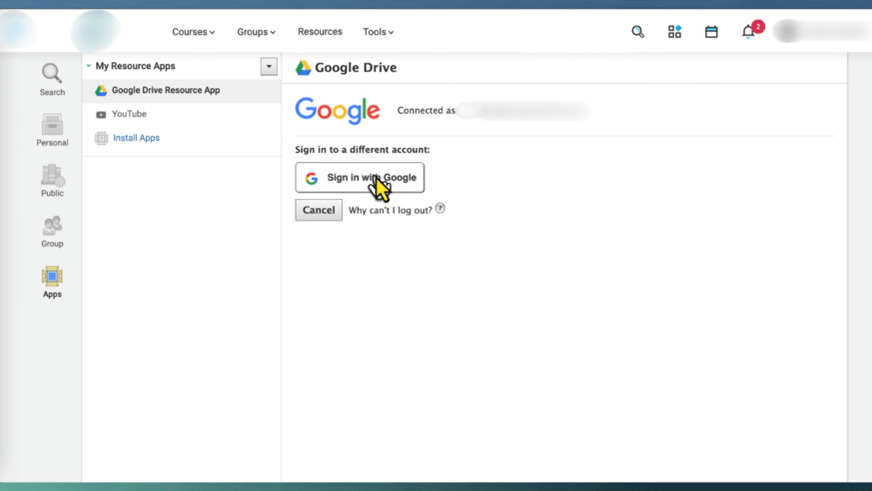
- Click ‘Sign in with Google’ to link your account
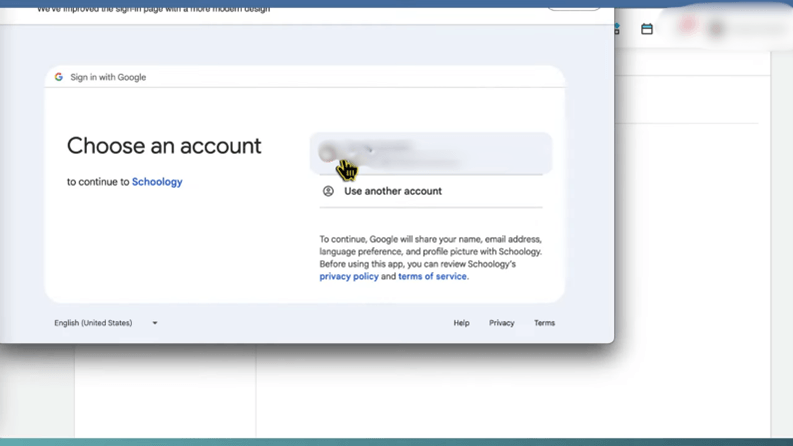
- After that, you will have to sign in by selecting your account. Make sure to select the admin account
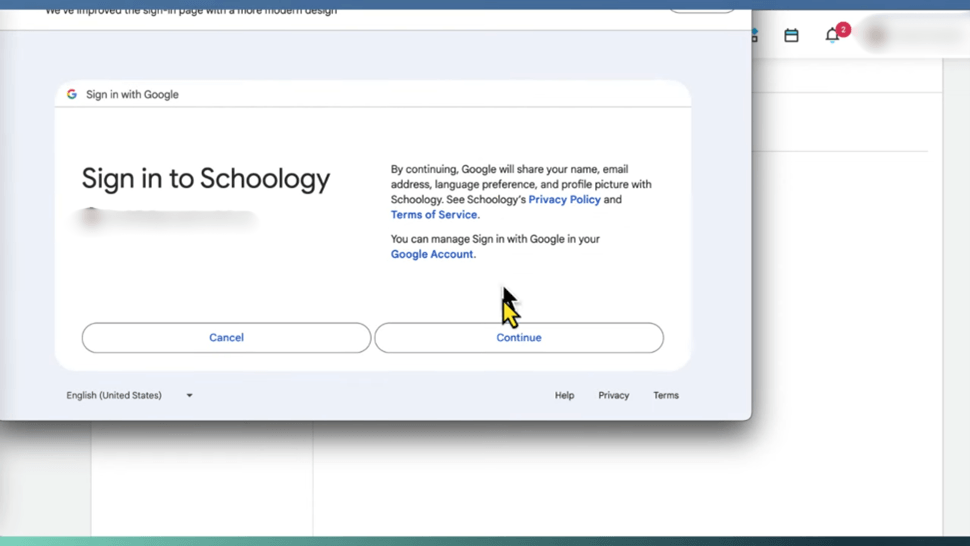
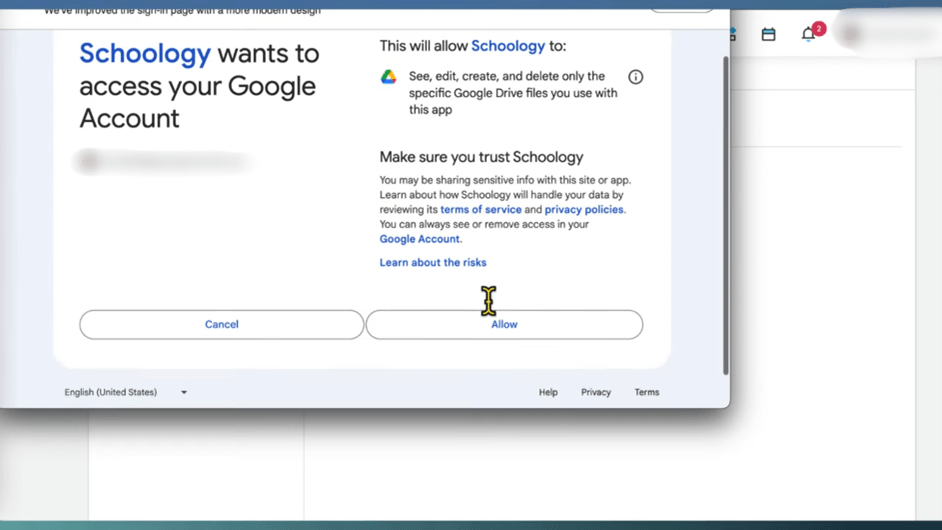
- Click on the ‘Continue’ button and then ‘Allow’
Now, you will be able to access your Google Drive materials
After successfully connecting Google Drive to your Schoology account, you can start adding files directly to your courses. Whether you need to upload lesson materials, share worksheets, or collaborate on projects, Schoology makes it easy to import content from Google Drive. Here’s how you can do it in just a few simple steps.
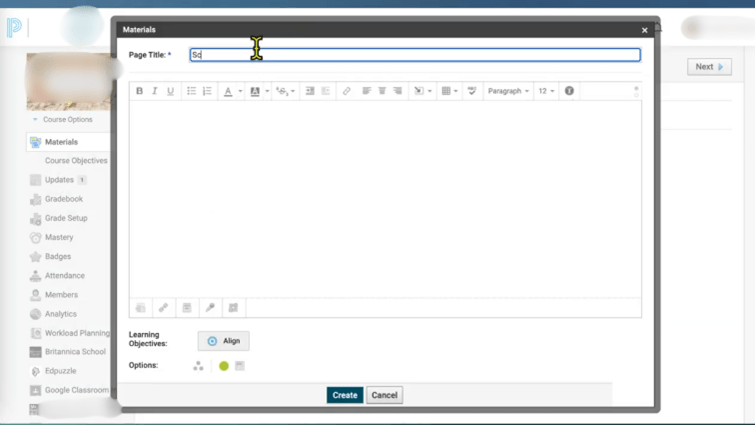
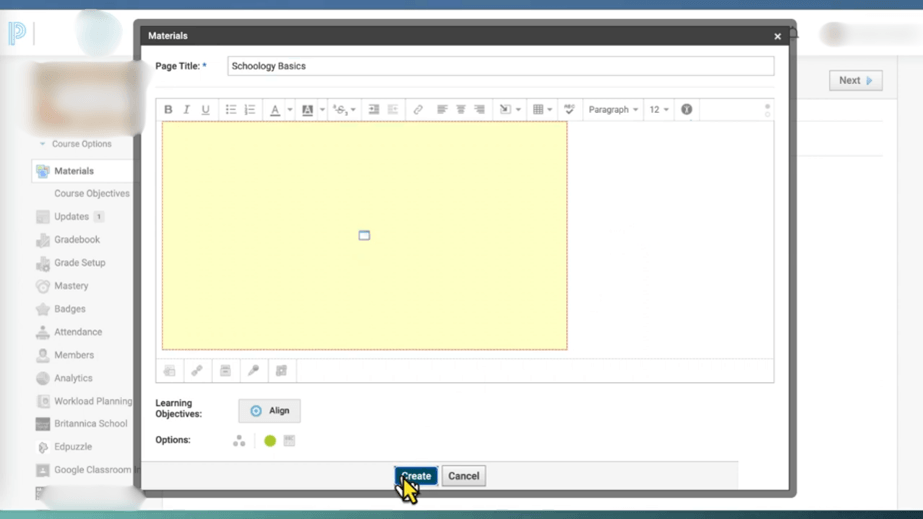
- Go to the ‘Add Materials’ menu
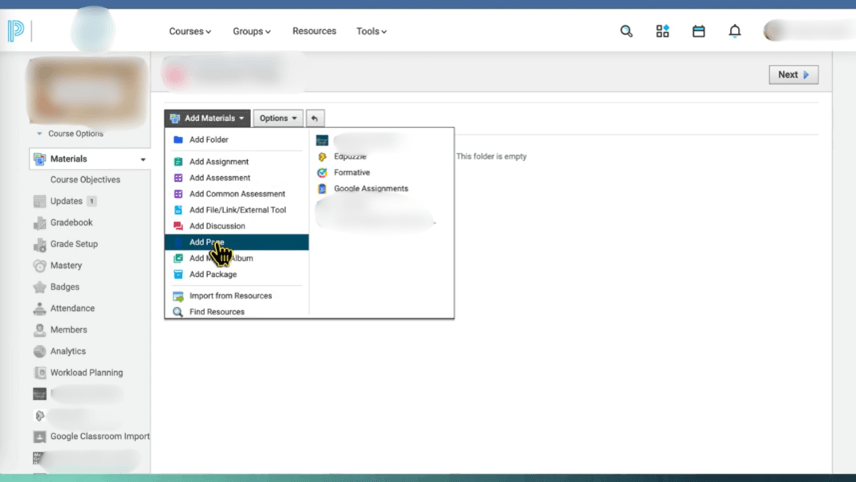
- Click on ‘Add Page,’ and another pop-up window will open and enter the ‘Page Title’
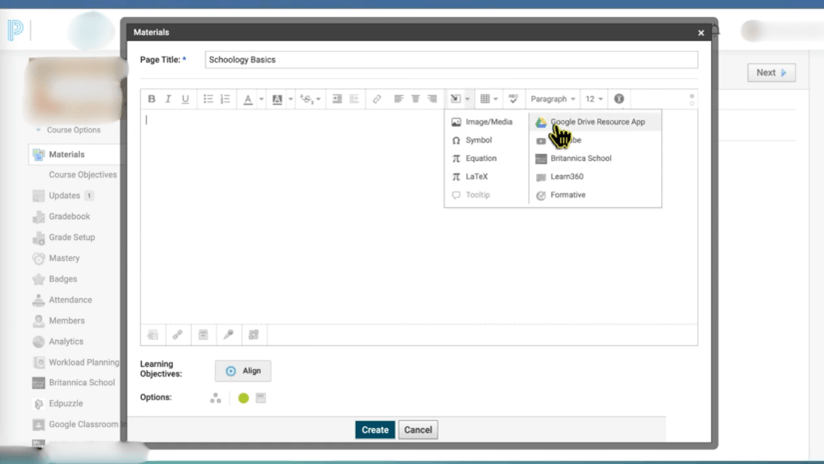
- Then go to the ‘Insert Content’ icon, and from the drop-down menu, select ‘Google Drive Resource App’
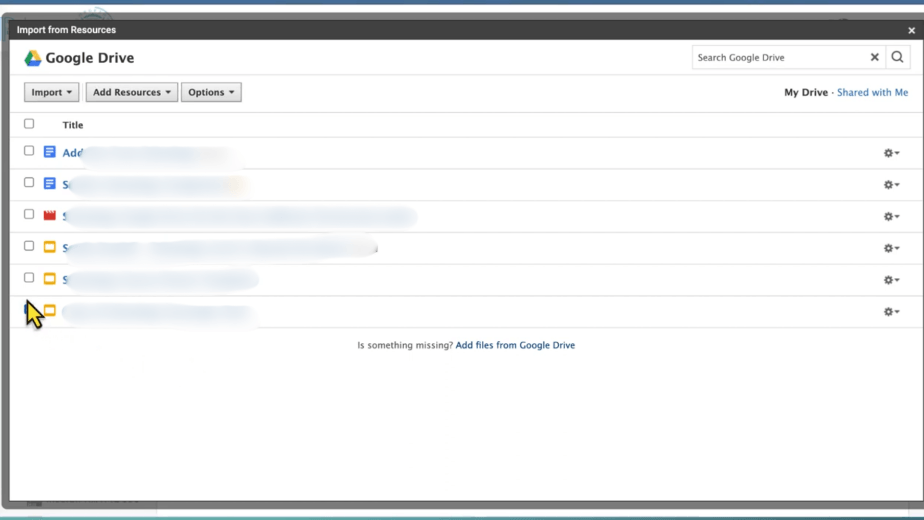
- Choose the document you want to add
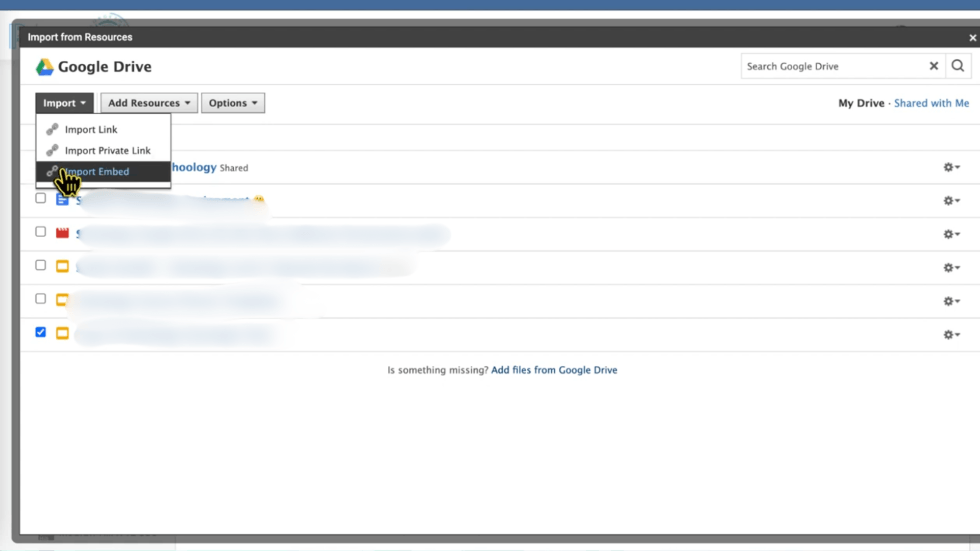
- Click on ‘Import’ and choose ‘Import Link’, ‘Import Private Link’, or ‘Import Embed’
- Once you are done, click on ‘Create’
Now that you know how to connect and use Google Drive with Schoology, you can focus on what truly matters – engaging in a smooth and efficient learning experience. If you have any questions, feel free to contact us.