
Making a video and adding it to Schoology can be a new experience—especially for those who are still getting familiar with its features and tools. However, it is a personalized way for teachers and students to communicate with each other. Videos can be easily created across many areas in Schoology—such as courses, assignments, and discussions to submit assignments, ask questions, and share suggestions.
This guide will walk you through the process of making and uploading a video in Schoology LMS in just a few simple steps, making it easy and hassle-free.
Creating videos in Schoology enhances collaboration and improves learning experiences. Below are some reasons for uploading videos in Schoology:
- Help simplify complex topics for a better understanding
- Makes communication clearer between teacher and student
- Enables personalized feedback for students
- Boosts student’s confidence and improves communication skills
- Encourages student engagement through visual learning
Whether you are a teacher who wants to simplify complex topics or a student who needs to submit an assignment or ask a question, creating videos can streamline the process. Here are some steps that you need to follow to make videos:
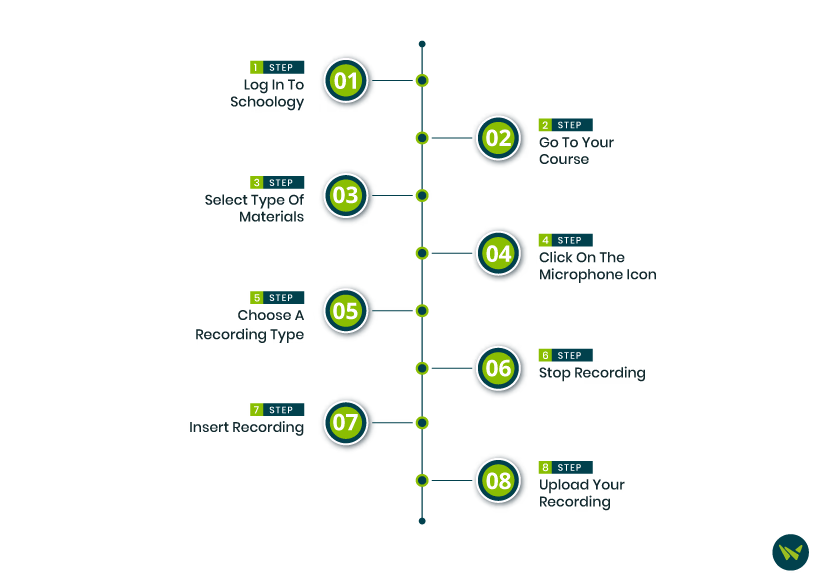
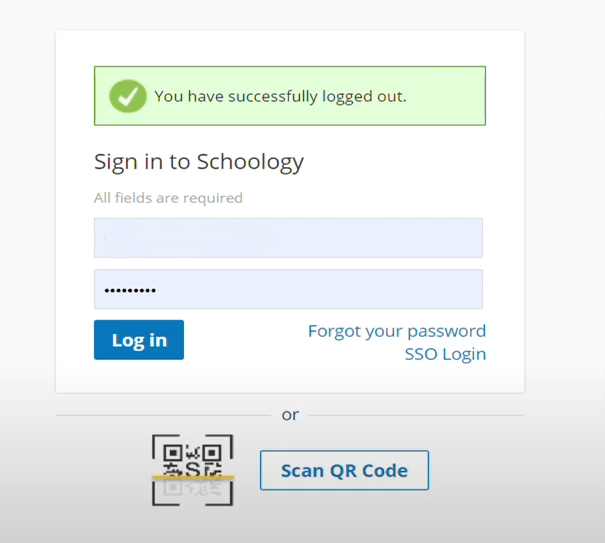
Step 1. Log In To Schoology
- Go to the Schoology Website
- Enter your email and password to sign in
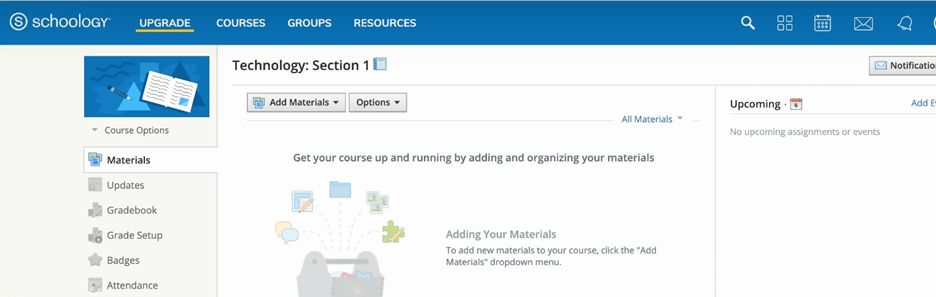
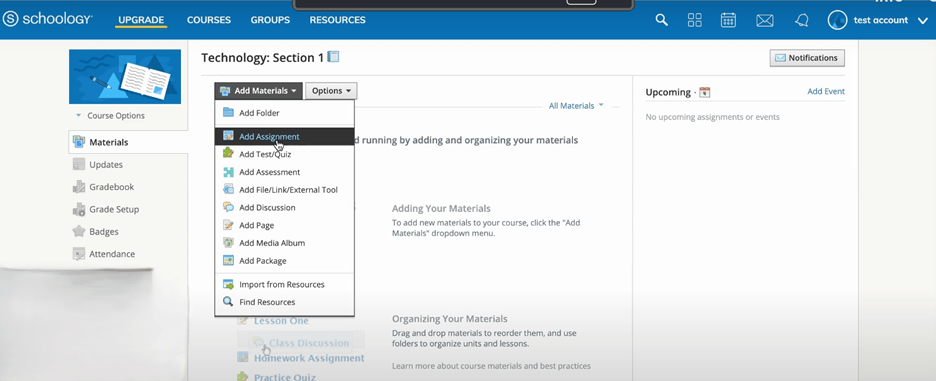
Step 2. Go To Your Course
- Go to the course from your dashboard where you want to add a video
- Navigate to the ‘Materials’ section
- Click on ‘Add Materials’
Step 3. Select Type Of Materials
- In ‘Add Materials’, select the type of content material you want to add from dropdown
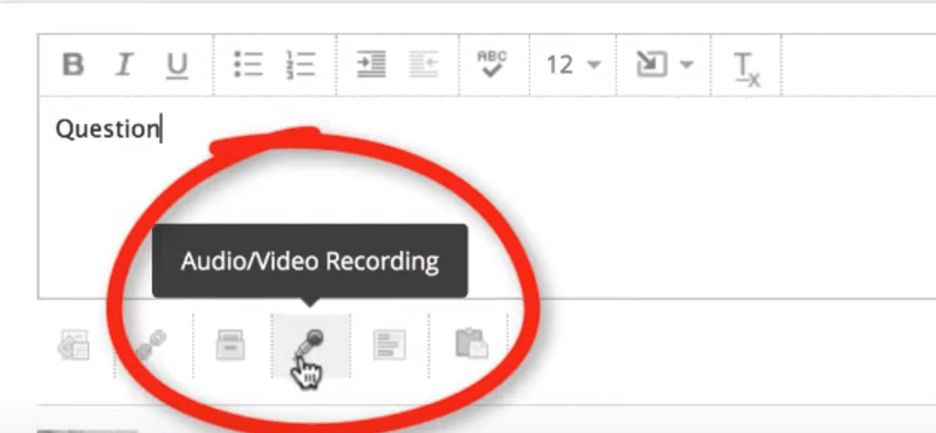
Step 4. Click On The Microphone Icon
- After creating an assignment, a new tab will open
- Select the ‘Microphone Icon’ from the bottom to access the ‘Audio/Video Recording’ option
- Give your recording a title before starting to clarify its purpose and context
Step 5. Choose A Recording Type
- Select ‘Audio & Video’
- This option lets you record your voice and video at the same time
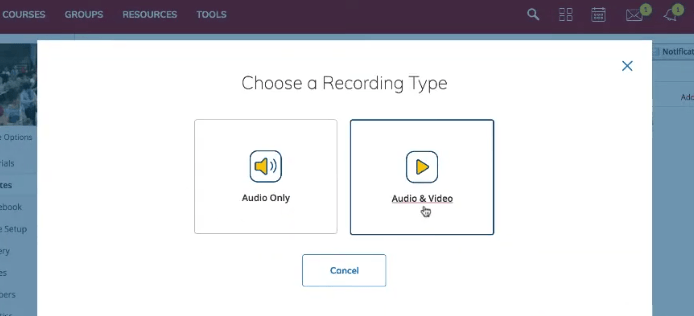
- Click on ‘Start Recording’
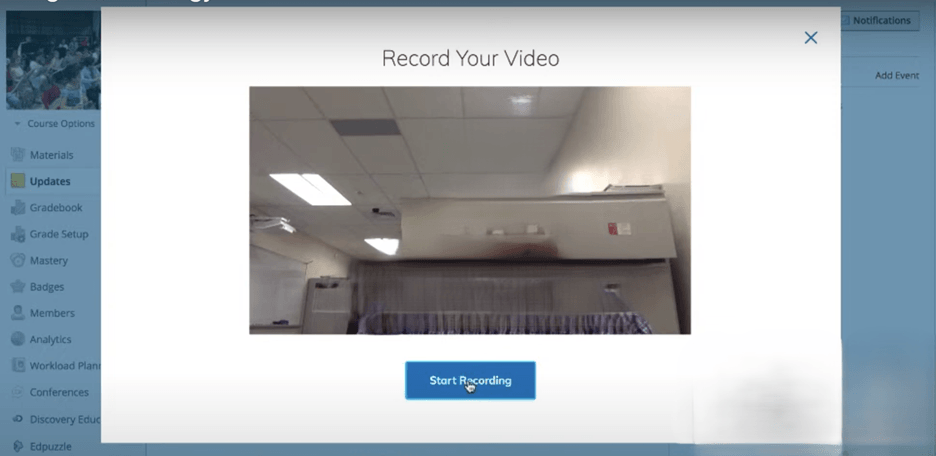
Important Note: When you start recording, a notification may prompt you to grant access to your camera and microphone. Allow access to avoid the recording being blocked.
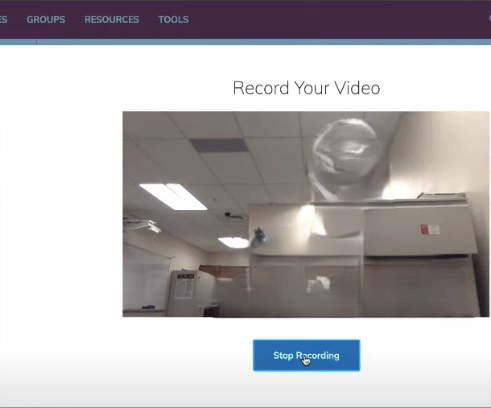
Step 6. Stop Recording
- After recording your video, click ‘Stop Recording’ and review it before submitting it
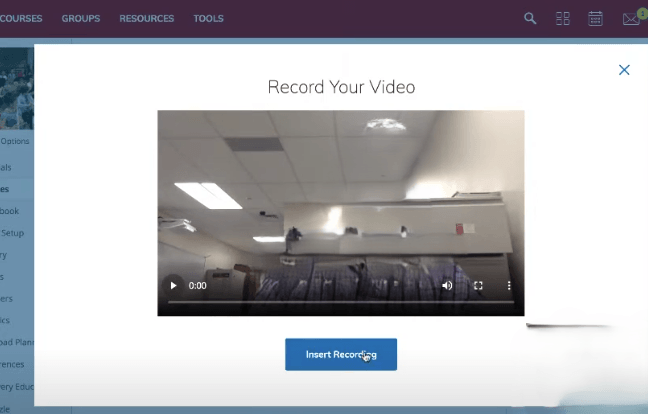
Step 7. Insert Recording
- Review your recording before inserting
- Click on ‘Insert Recording’, and it will undergo the final process of uploading
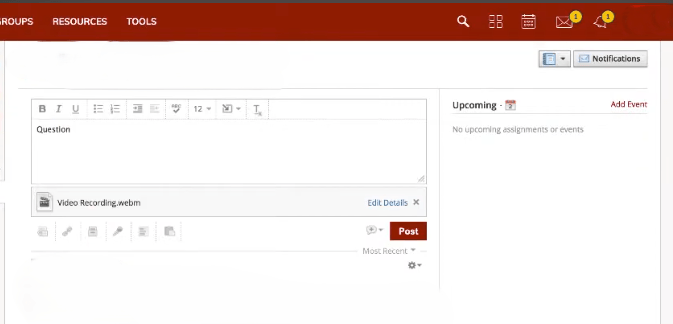
Step 8. Upload Your Recording
- Click ‘Post’ to complete the process of uploading
- Your video will appear in the course feed or discussion
Pro Tip: Keep videos under 100 MB to ensure smooth uploading and improve engagement.
In the end, making videos in Schoology is not a difficult one—it is a convenient and effective way to communicate and improve both learning and teaching experiences. By following the steps mentioned earlier, you can create videos in any section of your course.