
Smartsheet is a cloud-based work management tool that combines a familiar spreadsheet-like interface with powerful project tracking and collaboration features. It enhances traditional spreadsheets with real-time collaboration, automation, and structured project tracking—eliminating scattered files and endless email threads.
While Smartsheet offers a wide range of capabilities, setting up projects and managing tasks efficiently can take time without the right guidance.
This step-by-step guide will show you how to use Smartsheet for project management, showing you exactly where to click and how to make the most of its features from start to finish. Let’s get started!
Smartsheet offers three primary item types for project management, each serving a specific purpose:
If you're new to Smartsheet, start by creating an account. The software offers a free trial, so you can sign up without cost.
Tip: You can sign in with Google or Microsoft for a faster setup
After logging in, you’ll land on the Home Dashboard to access all your projects, sheets, and reports. On the left side of the screen, there’s a vertical toolbar with several icons. This is your primary navigation. The icons typically include:
These templates help standardize projects by keeping column names, types, and formatting consistent. You can customize them by editing columns, adding data, or adjusting automation. To use a template, go to the ‘Template Gallery’, select one (e.g., Project Plan, Gantt), rename it, choose a workspace, and click ‘Create’.
Some templates include example data, which you can remove using ‘Save as New’. To create your template, open a sheet, go to File > Save as Template, enter a name and description, select what to keep (automation, formatting, attachments), and click ‘Save’. While templates can’t be shared directly, you can move them to a shared workspace or invite collaborators when creating one.
The system offers various views to help you visualize and manage your projects effectively.
To switch between these views, use the view buttons located in the top toolbar of your Smartsheet. Each view pulls from the same data source, ensuring that updates in one view reflect across all others.
Smartsheet makes team collaboration seamless by allowing everyone to work on a live project plan instead of emailing spreadsheets. You can control permissions, discuss updates directly on the sheet, and keep everyone informed. Here’s how to get started:
Sharing Sheets And Managing Permissions
- Click the 'Share' button in the top-right of the sheet
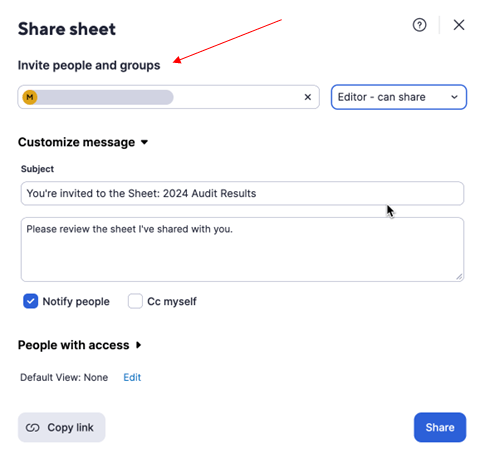
2. In the ‘invite people and groups’ field, type the email address of the person or the group you want to add
3 Set Permissions:
- Viewer – Can only view and export
- Editor (can share/cannot share) – Can edit tasks and, if allowed, share further
- Admin – Can modify structure, manage sharing, and make full changes
4. Select ‘Customize message’ (Optional) to include a personalized quote
5. Click ‘Share’, and Smartsheet will email an invitation to the recipients
You can always return to adjust permissions or remove access. Shared users will find the sheet under ‘Shared to Me’ or in the assigned workspace.
Using Comments, Mentions, And Real-Time Updates
Instead of long email threads, you can add comments to specific tasks by clicking the speech bubble icon on a row. This opens a conversation thread where discussions stay organized. To grab someone’s attention, use @mentions by typing ‘@’ followed by their name or email. This sends them an instant notification with a direct link to the sheet, ensuring faster responses. All edits happen in real time, so any changes team members make appear instantly.
One of the simplest but most useful features is the automated alerts and reminders. You can set conditions like upcoming due dates or task completion deadlines, and the system will provide a visual workflow editor to track your automations. To create an alert or reminder:

- Click ‘Automation’ in the top toolbar and select ‘Create a Workflow’ (or use a pre-made template)
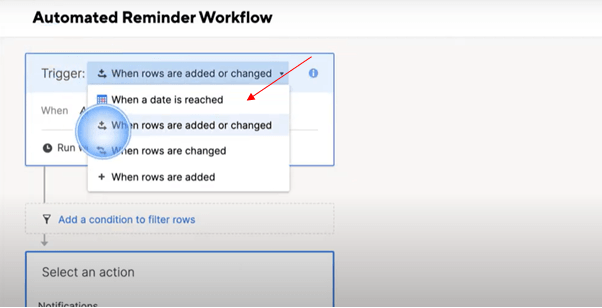
- Choose a trigger: when rows are added, changed, or when a specific date is reached
- (Optional) Add conditions to limit the rule to certain tasks
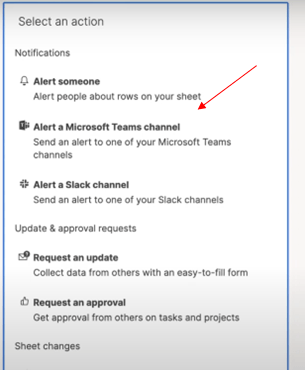
- Select what happens when the trigger is met: ‘Alert someone’, ‘Request an update’, ‘Request an approval’, or ‘Change a cell value’
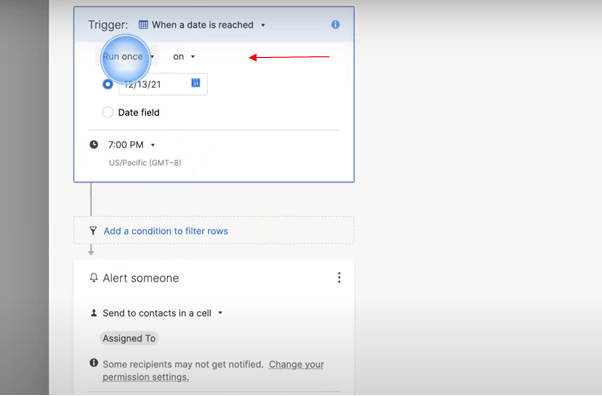
- Choose how often the workflow runs: ‘Immediately’, ‘Hourly’, ‘Daily’, or ‘Weekly’
- Name the workflow, save it, and ensure it is ‘on’
Note: Alerts only notify users who have access to the changes. Reminders won’t trigger if the sheet is empty or missing data.
The system’s reports help track project progress by filtering and consolidating data from one or multiple sheets. Meanwhile, the dashboards provide a visual summary of key project metrics. Here’s how to set them up:
Creating A Report
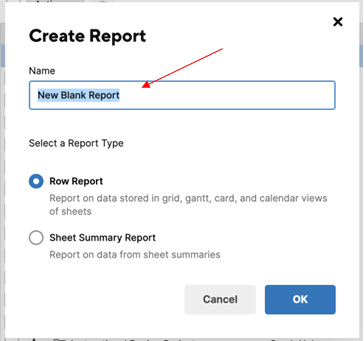
- Click ‘+’ (Solution Center) and select ‘Create Report’ > ‘Row Report’ to consolidate data from multiple sheets
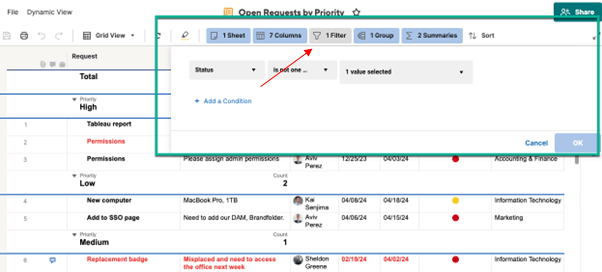
- Select source sheets (up to 30,000) and set filter criteria to display relevant tasks, such as incomplete or high-priority items
- Choose columns to display, then sort or group data as needed
- Click ‘Run’, then ‘Save’, and name your report
Creating A Dashboard
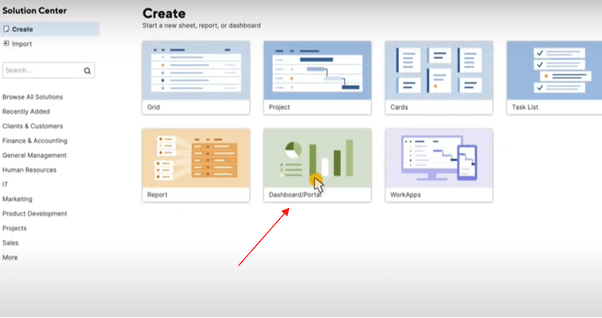
- Click ‘+’ and select ‘Dashboard’ to create a high-level project view
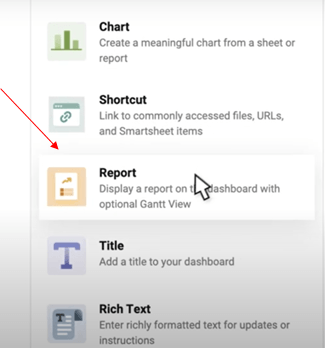
- Name the dashboard, click ‘Edit’, and add widgets like Metric (key numbers), Chart (task status), Report (live updates), Image (logos), or Shortcut (quick links)
- Click ‘Save’ to finalize and ensure the dashboard reflects real-time data updates every 10 minutes
The dashboard updates automatically with real-time data, providing a clear project overview for meetings or leadership.
The software integrates with other apps to simplify project management. With Microsoft Teams, you can add Smartsheet sheets or dashboards to a Teams channel, allowing your team to view or edit them without leaving Teams. Additionally, you can set up alerts for automatic updates.
Its Slack integration enables task updates to be sent to channels or direct messages, ensuring quick and clear communication. For development teams, the Jira integration syncs tasks between Smartsheet and Jira in real time, keeping everyone aligned and on track.
This guide has covered the essential features of Smartsheet and how it simplifies project management. With its flexible views, automation, and collaboration tools, it adapts to different team needs and workflows. If you’re ready to enhance productivity and streamline your projects, explore Smartsheet and use this guide to get started.