
Having the right account up and running on isolved is essential for receiving your pay on time and without running into any technical issues. In this article, you’ll learn how you can change your direct deposits properly and in time. We will also cover a number of other account-related topics that you might need in order to set up an operational direct deposit in isolved.
So, without any further delay, let's start our guide.
Changing direct deposit on isolved is an easy task, but it needs to be done accurately and with full attention. Follow these steps to update/change your direct deposit:
- Log in to your isolved account
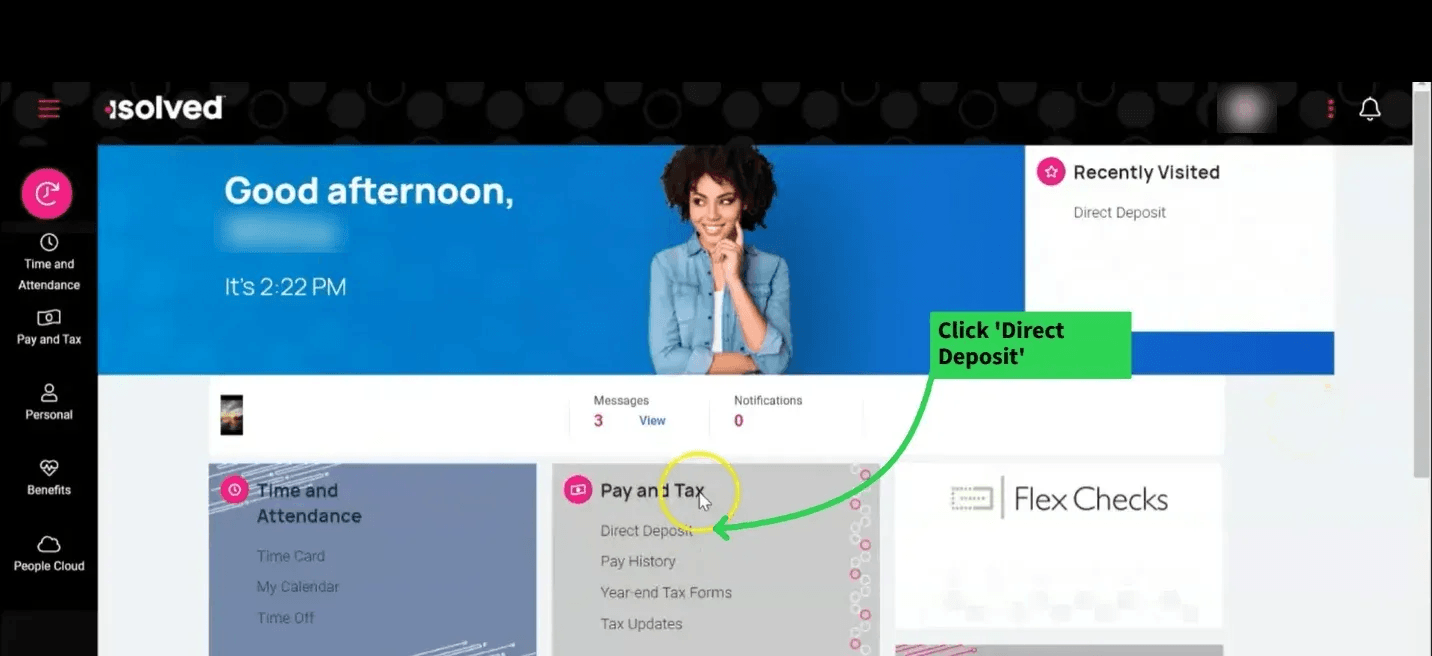
- Navigate to ‘Pay and Tax’
- Click ‘Direct Deposits’ from the navigation bar
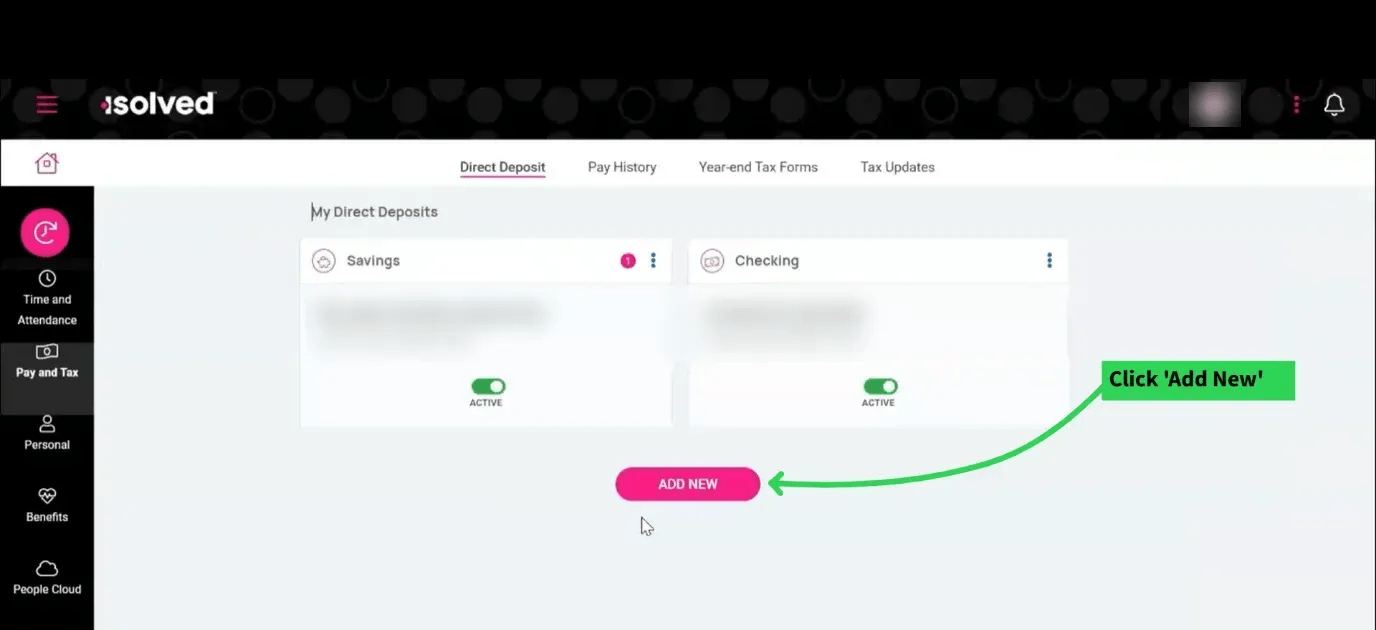
- Select ‘Add New’
- Enter the direct deposit details
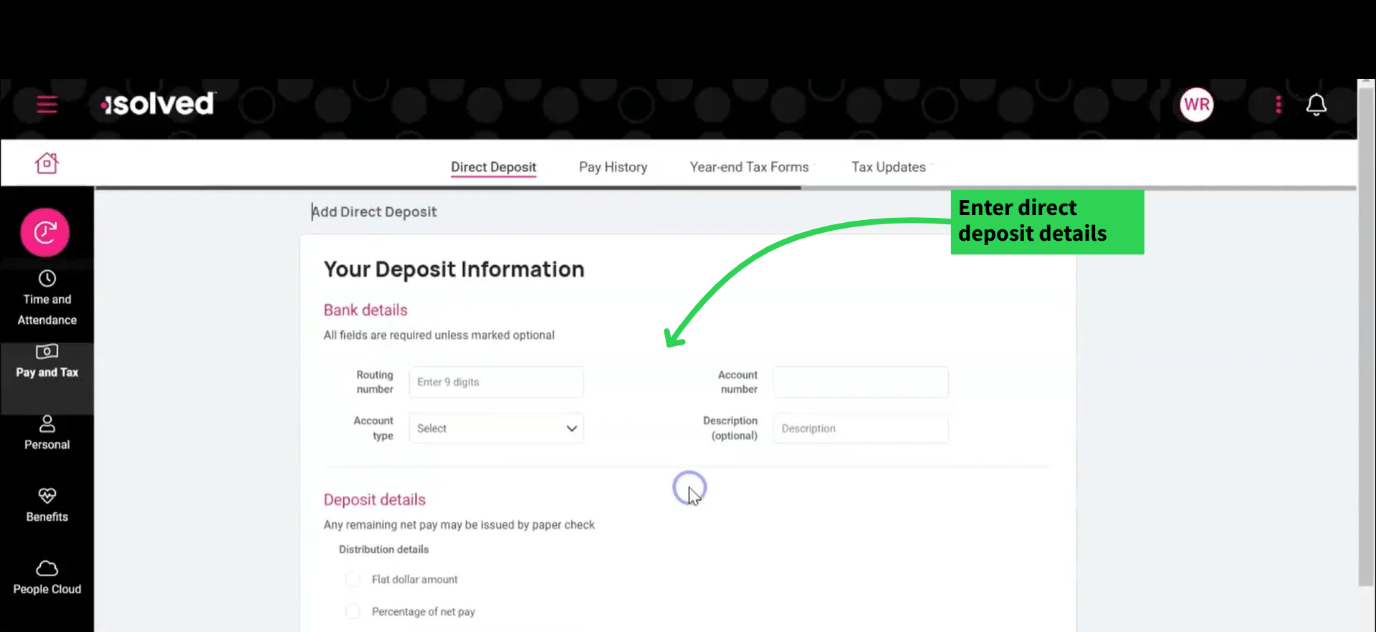
- Review all the sections
- Click ‘Save’
Changing or updating direct deposit is also quite simple on the mobile app, and the steps are somewhat similar to that of the web version. Here’s what you’ll have to do to update your direct deposits from your isolved mobile app:
- Log in to your mobile app
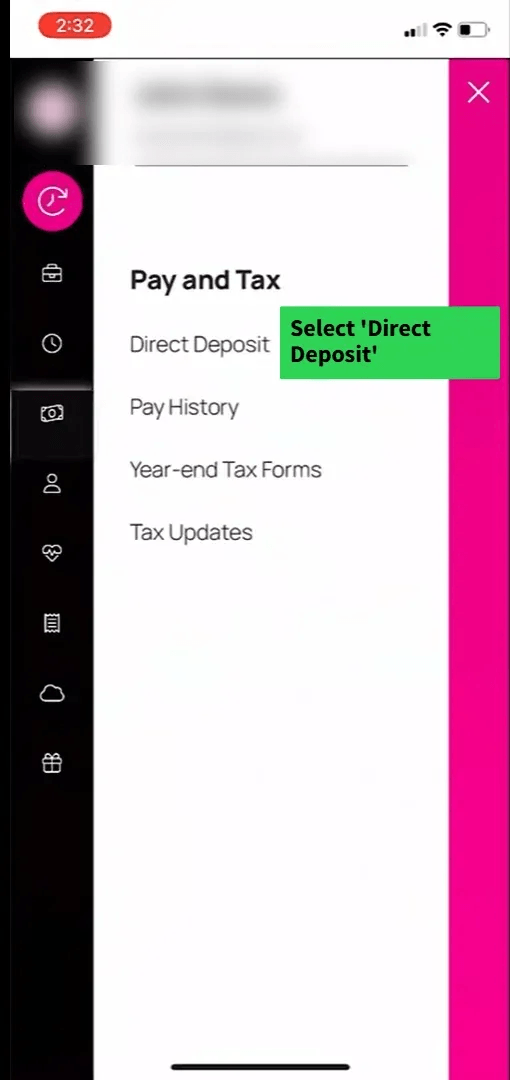
- Click on the ‘Menu’ icon in the upper left corner
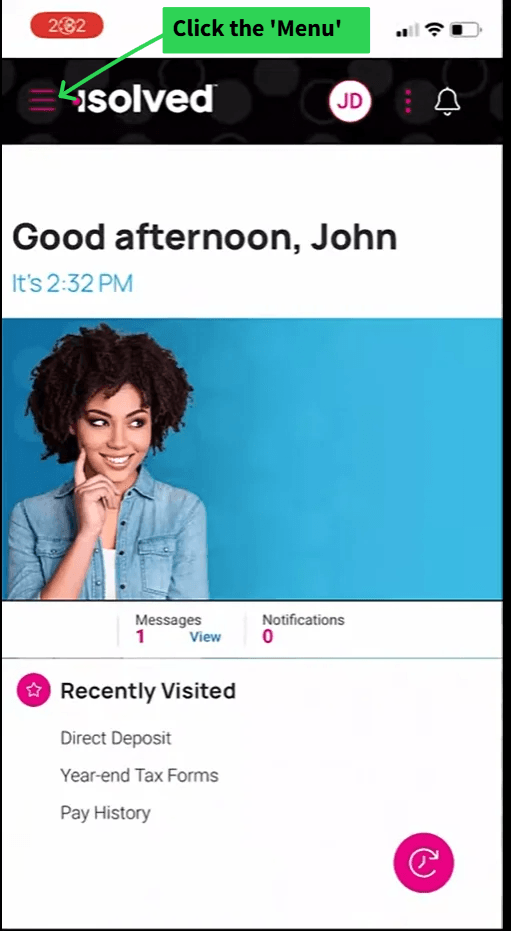
- Select ‘Direct Deposit’ under the ‘Pay and Tax’ heading
- Click ‘Add New’, fill in the account number, routing number, and other necessary details
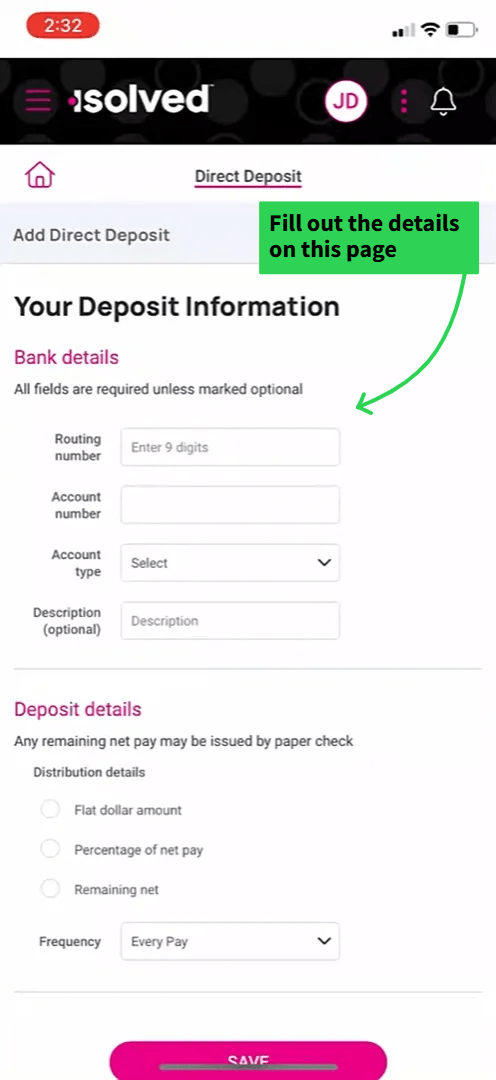
- Press ‘Save’
Once saved, you’ll see a green bar at the top confirming the information update.
Employees can decide to have their salaries split into multiple accounts. The payment can be split into two parts by percentage or by a flat dollar rate.
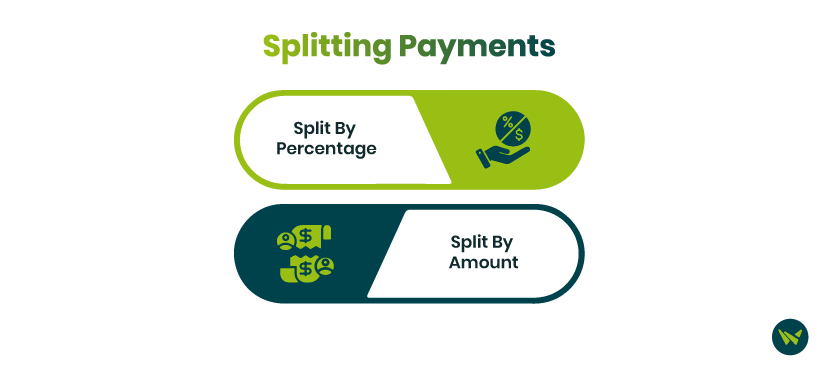
Split By Percentage
Follow these steps to have your pay split by percentage:
- Log in to isolved
- Go to ‘My Pay’ section
- Select ‘Direct Deposits’
- Click ‘Add New’
- After adding details, such as account number and routing number, scroll down
- Go to the ‘Deposit Details’ section
- Select ‘Percentage of Net Pay’
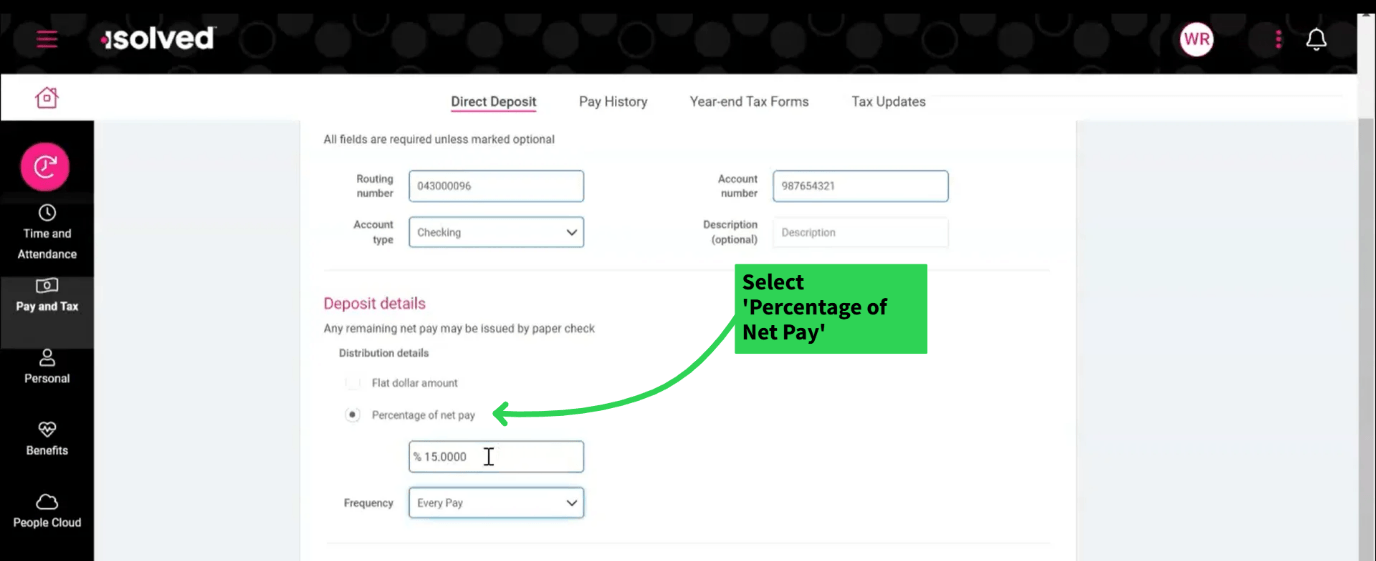
- Adjust the percentage you want to receive in the account (In the example, it’s 15%)
- Set the frequency. (Set it to ‘Every Time’ if you are a full-time employee and want your salary to split every payroll)
- Click ‘Save’
Split By Amount
Follow the same steps mentioned above till you reach the ‘Deposit Details’ section, then:
- Select ‘Flat Dollar Amount’
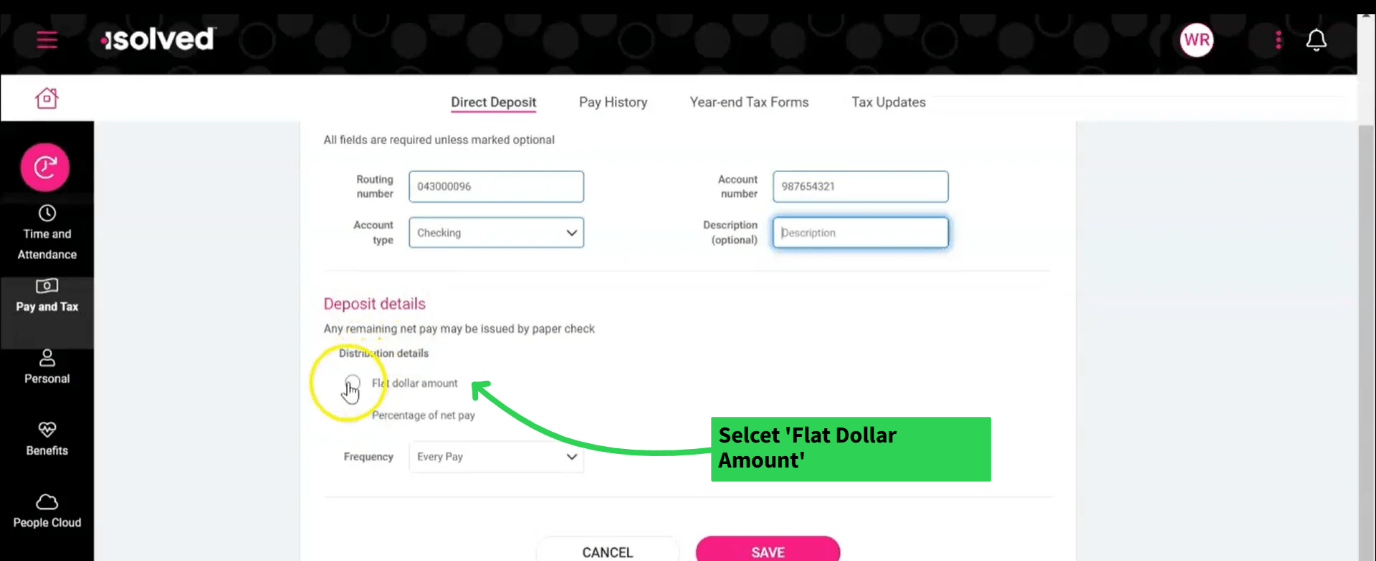
- Type in the amount you want to receive in this account
- Set the frequency (Ideally, it should be ‘Every time’ if you are a full-time employee)
- Click ‘Save’
Splitting Accounts Using The Form
The form allows employees to register multiple accounts and have split payments. After filling in the basic info, such as names and account numbers, you can fill each column for splitting purposes.
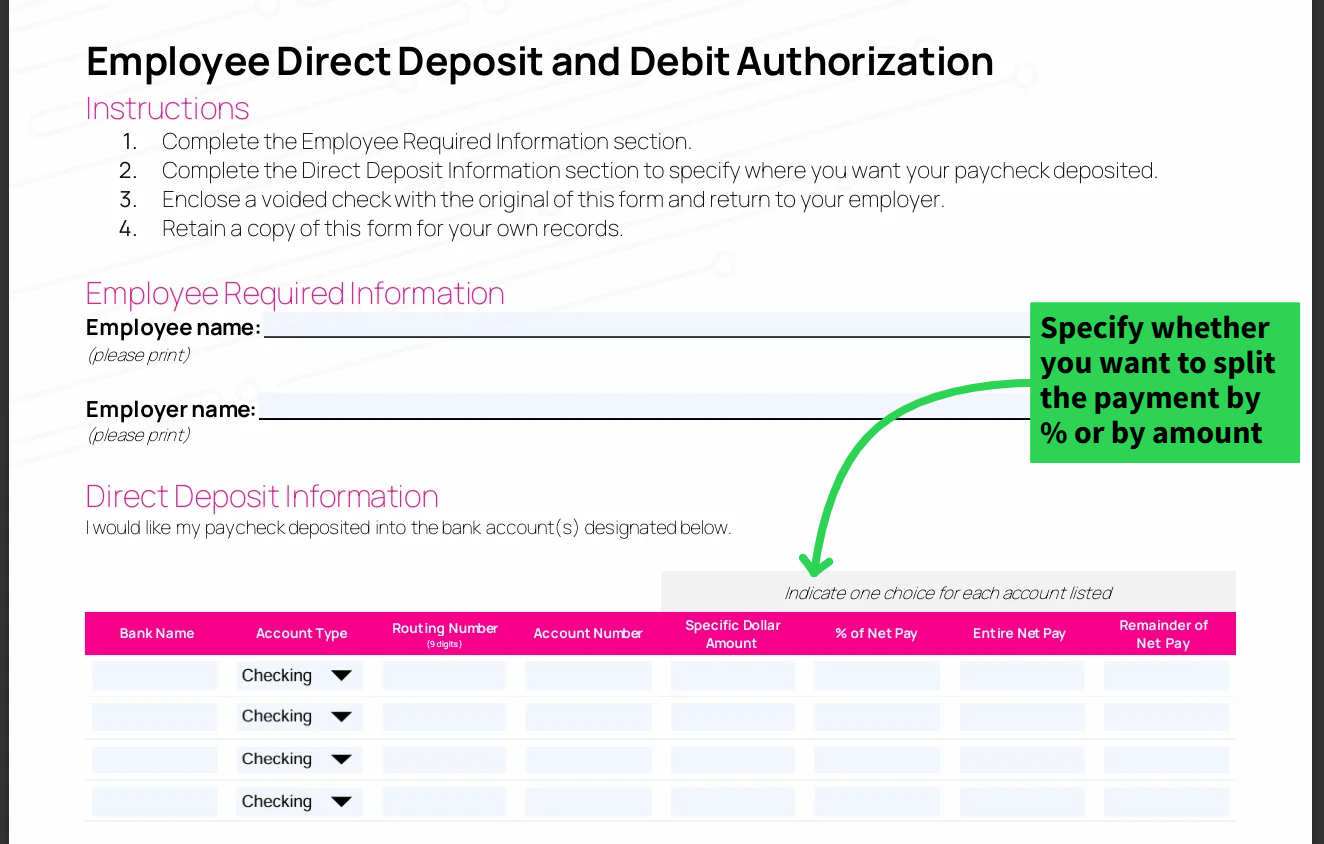
Here’s what each column means:
