Independent practices in healthcare seek various strategies to optimize their administrative workflows in order to enhance patient care. A crucial aspect of this optimization includes effectively implementing and utilizing electronic medical records (EMRs).
A research study shows that implementing an EMR/EHR system can increase organizational efficiency in healthcare. This also prevents human errors that may come with manual input and data handling.
In this context, Kareo EMR (now part of Tebra) has emerged as a popular cloud-based platform, offering comprehensive tools, designed to support the workflow of independent practices. Trusted by 42,000 practices, this EMR simplifies administrative tasks and streamlines the records with features that range from patient intake to deletion.
This guide explores the process of deleting and deactivating a patient record and patient chart on Kareo EMR software, highlighting how it helps optimize organizational operations.

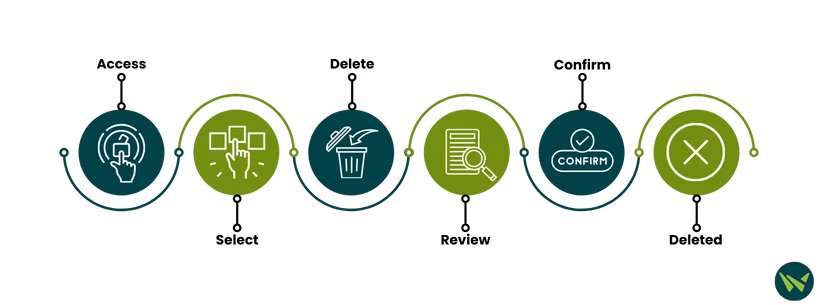
Here is a comprehensive guide to deleting a patient on Kareo:
- Access Tebra (Formerly Kareo + PatientPop) and open the ‘Patients’ drop-down menu. Click on ‘Find Patient’ to get patient record intended for deletion
This overview shows the EMR’s patient records interface
- Click on the required patient’s record to select and highlight it
- Hit the ‘Delete’ button at the bottom to send the prompt
- Review the confirmation message in the pop-up window
This interface shows the deletion process of patient on Kareo
- Press the ‘Yes’ button to confirm the deletion
- The patient record will now be deleted
Important Things To Consider Before Deleting A Patient
- Only patients who do not have any associated records, such as appointments, encounters, and cases can be deleted
- The clinical data associated with the patient will not hinder the deletion of the patient's record
- To prevent the clinical data from being deleted, it is recommended to deactivate the patient instead

Here is how users can deactivate a patient record without permanently deleting it:
- Find the patient's name in the software using the steps above
- Double-click on the name to pull up the record
- By default, the ‘General’ tab in the ‘Edit Patient’ window will open
- Locate the ‘Active’ option on the right side of the patient’s name
- Uncheck the option to deactivate the patient
- Afterward, click the ‘Save’ button to apply the changes
- The patient record will be deactivated
This is an interface of a patient profile on Kareo
Alternatively, users can deactivate a patient chart on Kareo when they no longer need immediate access. It removes the patient from search results and mark them as inactive. This action is often taken when the patient is deceased or no longer a patient in the clinic.
Here is how a user can deactivate a patient chart on Kareo, as opposed to deleting or deactivating a patient:
- Search for the patient's name on the search bar at the top of the screen
- Access the required patient record by selecting it
- Now, click the ‘Edit’ button to open the ‘Profile Editor’
- Here, you can make the required modifications to the patient’s history
- Locate the ‘Active Patient’ checkbox and uncheck it to mark the patient inactive
- Click the ‘Save’ button to apply the changes and update the patient’s status
- Once saved, the patient chart will be marked as inactive
This is an interface of a patient Profile Editor on Kareo
Deleting or deactivating a patient on Kareo is a simple and straightforward process. By following the aforementioned steps and considering key factors, independent practitioners can optimize their workflow while also ensuring that no important data is lost.
