

TalentReef is an applicant tracking system (ATS) and talent management platform designed for high-volume, hourly workforce hiring. More than 500,000 HR professionals and recruiters across 160+ countries use this system to post job openings, track applicants, communicate with candidates, and onboard new hires – all within one easy-to-use platform.
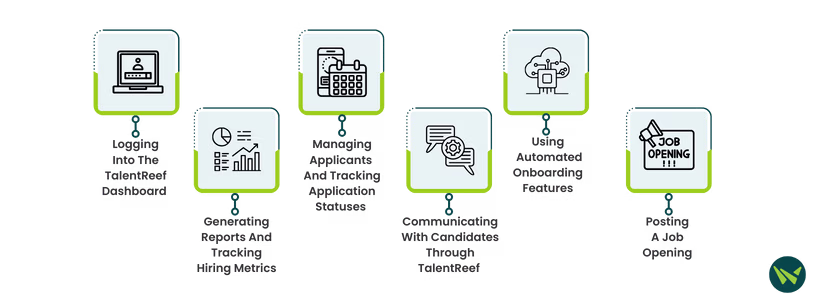
In this guide, we’ll walk you through everything you need to know about how does TalentReef work – from logging in to using features like candidate texting and generating reports. Let’s get started.
To begin, access the TalentReef Manager Portal, where you’ll manage all hiring activities. Follow these steps to log in:
- Open your web browser and go to TalentReef’s ‘Manager Portal’ login page

- Type in the ‘Username’ and ‘Password’ provided by your organization. (New users typically receive their login credentials via an email from TalentReef’s system. If you haven’t received credentials, check with your administrator)
- Click the ‘Log in’ button. After successful authentication, you will land on the TalentReef dashboard, also known as the Manager Portal home page. This dashboard highlights your key tasks and alerts (such as the number of new applicants to review)
- If you cannot remember your password, use the ‘Forgot password?’ link on the login page. Enter your email or username to receive a password reset link. The software’s help center can also assist with any other account access issues
Dashboard Overview: After logging in, you’ll see a dashboard with pending action items and key metrics at a glance—like ‘X New Applicants’ or ‘Y New Hire(s) in Onboarding.’ This helps you quickly spot what needs attention first, such as reviewing new applicants. A ‘Jump To’ menu (usually in the top corner) lets you navigate to sections like Postings, Applicants, Reports, and Onboarding, which we’ll use in the next steps.
One of the first tasks is to create and post a new job opening in TalentReef. The platform makes it simple to publish job listings to your career site and job boards. Follow these steps to post a job:

- From the dashboard, click on the 'Jump To' menu (usually in the upper-left) and select 'Postings.' You can also access Postings directly from the dashboard home screen if a shortcut is provided. This will take you to the job posting management page for your location or organization

- On the Postings page, click on the 'New' drop-down in the upper-right and select 'Hourly Posting'. If your company has multiple store or site locations, you'll be prompted to choose the location(s) for the new job opening. Use the right arrow ( > ) to move your selected location(s) to the assigned box. Click 'Next' to proceed
Fill out the job posting form with the relevant details:

- Job Title And Description: Enter the job title and a clear job description. You can add unique details such as pay rates, physical work requirements, or special shifts. If you have permission, TalentReef lets you edit the job description directly
- Location/Department: Make sure the correct location is selected. The zip code usually auto-fills, but if it's missing or incorrect, contact support
- Job Category And Attributes: Choose the correct position type (full-time, part-time, temporary/seasonal), and fill out any required fields such as number of openings, application cap (recommended: 5,000), posting type (new headcount, backfill, or evergreen), and visibility settings (internal/external)
- Application Workflow: Some companies have different workflows or question sets. Confirm if a specific application workflow needs to be selected
- Posting Duration: Set the job posting's start date. The end date is only for your reference and won't automatically close the job unless the 'Close jobs on end date?' option is enabled in your Source Configuration. Click 'Next' to move further
Optional: This step appears only if your company has enabled customized locations. If shown, the posting location's zip will be displayed. You can select 'Yes' to edit the address if needed (useful for jobs without a fixed physical location). This won't affect your applicant pool search criteria. Click 'Next' to proceed to the job schedule setup.

- Choose the position status (only one): full-time, part-time, or temporary/seasonal. You can also select preferred work days, shifts, and note if the job includes a changing schedule (this is for internal reference only). Then tap 'Next' to add internal requirements for applicants

- This section helps hiring managers understand what makes a strong applicant. These notes are internal only and won’t block applicants. If you want these as required screening questions, you'll need to submit a configuration change request. Select 'Next' to move to the job description (if enabled)

Optional: If your account has the 'Edit Hourly Job Description' permission, you'll see this extra step. Here, you can add custom text to the top or bottom of the default description – such as special work conditions, pay rates, or expectations. Click 'Next' to review your entire job posting before submission.

- Check the posting you've created. If you need to edit a section, click it in the summary bar. Once everything looks good, click 'Submit job posting.' Your job will appear on your Career Page and external job boards starting from the start date you selected
Tip: If you need to update the job description or requirements later, return to the ‘Postings’ section, select the job, and choose ‘Edit.’ Make your changes and save. When a position is filled, or you want to stop collecting applications, you can close or archive the posting. This will remove it from the active job listings (and you can always repost or copy it later if needed). Remember that if you edit a job description for a live posting, the best practice may be to create a fresh posting, so the changes are fully captured for new applicants.
Once your jobs are posted, applications will start coming in. TalentReef provides tools to help you manage incoming applicants and keep track of where each candidate is in the hiring process. Here’s how to manage applicants effectively:
- Click the 'Jump To' menu and select 'Applicants.' You’ll see a list of job openings and their applicants. You can filter by location or requisition. Each job shows the number of applicants and status breakdowns
- New applicants are often marked as 'New' or 'Applied.' Click a job to see all applicants, along with key info like name, date applied, and current status. You may also see a score or star rating that highlights how well a candidate fits the job
- Click an applicant’s name to view their profile, including application answers, resume, work history, and assessments. Update their status (e.g., Mark as Reviewed) using a dropdown or button to move them forward

- Statuses help track progress—like New, Mark as contacted, Interview, Offer, Hired or Released. For example, after reviewing an applicant, you can move them to 'Mark as contacted' or 'Interview' depending on the next step. If they’re not fit, change their status to 'Released' to formally remove them from consideration. This keeps your system organized while allowing applicants to apply for future roles
- Select multiple applicants to perform bulk actions—like sending messages or updating statuses. Use checkboxes in the 'Actions' menu to save time when handling high volumes
- Use the search bar or filters to find applicants by status, date, or other criteria. Adjust filters to view older applications if needed
This system has a ‘Text Communications’ feature that enables two-way SMS messaging with candidates directly from the platform. The interface is designed to feel like a familiar text message inbox, where you can see conversations with each candidate and reply in real time. This means you can send a text to a candidate (for example, to invite them to an interview or follow up on a missing detail), and the candidate’s replies will appear in the software for you to read – no need to use your personal phone. All communication is logged, giving you an audit trail of exchanges.
After you mark a candidate as ‘Hired’ in TalentReef, the onboarding process begins. The system automates key tasks—like assigning forms, collecting digital signatures, and handling compliance—so new hires can start smoothly and managers save time. Here is how to use it:

- Once the applicant’s status is changed to ‘Hired’, onboarding is triggered. You can view all new hires in progress by going to the ‘Jump To’ menu and selecting ‘Hired: Onboarding’ (the label may vary slightly based on your system settings)

- In the onboarding section, you’ll see each new hire’s status and progress. TalentReef automatically assigns common forms like W-4s, I-9 (Section 1), direct deposit, and company policies. Still, some setups may require you to click ‘Begin Onboarding’ or ‘Assign Forms’ in the new hire's profile—so it's good to double-check
- New hires receive an email with login instructions and access their Employee Portal using the same TalentReef account they applied with. From there, they can digitally complete their onboarding paperwork before their first day
- As a manager, you’ll also have tasks—like completing I-9 Section 2, verifying documents, confirming the start date and pay rate. You can manage these using the ‘Things you can do’ menu or the ‘Edit Employee Details’ option

- With TalentReef, you can integrate E-Verify, process WOTC applications, and handle state-specific compliance forms seamlessly. The system walks you through the required steps to make sure everything is filled, signed, and stored correctly
- Use the onboarding dashboard to monitor each hire’s progress. You'll see whether they’re ‘In Progress’ or have completed specific steps. Managers can send email reminders—and, in some setups, text nudges—to help candidates stay on track
- Once onboarding is complete, all forms are saved securely in TalentReef and can be exported or synced to your HRIS or payroll system. Documents like the W-4 and I-9 forms remain available for download or printing anytime
The platform makes it easy to track your hiring performance through its built-in reporting and analytics tools. To access reports, go to the 'Jump To' menu, select 'Reporting & Analytics,' and then click on 'Analytics.' This will open the TalentReef Analytics Dashboard. Depending on how your system is set up, you may see multiple tabs such as Applicant Analytics, Job Postings, Onboarding, and even custom reports.

This screenshot shows an example Applicant Analytics dashboard. At the top, you can filter data by date range, location, position, and more. The charts and metrics below are then updated to show trends in your applicant flow. For instance, you can see the total number of applicants over time, broken down by source (job board, referral, etc.), and performance metrics like the average time a job post stays open or average time to review an application. These visual reports help HR track key hiring metrics at a glance.
This guide has covered how does TalentReef works and how it simplifies high-volume hourly hiring. With its centralized dashboard, job posting tools, applicant tracking, texting features, onboarding workflows, and built-in reporting, it adapts to the needs of busy hiring teams. If you’re ready to streamline your recruiting process, explore the platform and use this guide to get started.