If you are looking to speed up payments in BILL (formerly Bill.com), using a Payment Network ID (PNI) is one of the easiest ways to do it. Each BILL account is assigned a unique PNI, which connects you directly with vendors or customers to minimize manual data entry and follow-ups.
In this guide, we will walk you through how to add a Payment Network ID in Bill.com to streamline your payment and accounts payable processes.

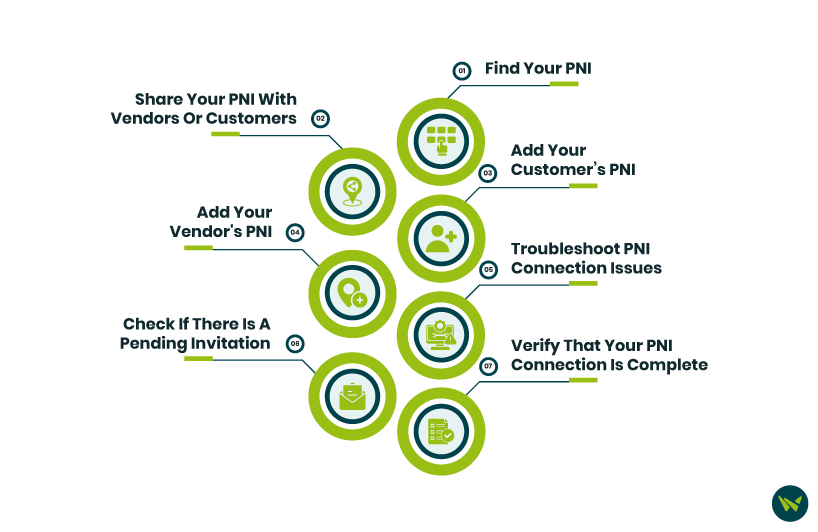
- Go to ‘Settings’ in Bill.com
- Select ‘Network’ under your ‘Company Profile’ section
- Note your 'PNI'
- Provide your PNI to your vendor or customer so they can enter it on their side
- Select ‘Copy’ to easily copy and paste your PNI into an email or message
You need to enter your customer’s PNI to receive payments in Bill.com. Here’s how:
- Select ‘Customers’ from the navigation menu
- Select the customer’s name
- Select ‘More Actions’
- Choose ‘Enter PNI’
- Enter your customer's PNI
- Select ‘Search’
- Click on ‘Connect & Get Paid’
- Confirm the connection
You also need to enter your vendor’s PNI to send and receive payments. Follow these steps:
- Go to ‘Vendors’ in the navigation menu
- Select the vendor’s name
- Under ‘Payment Network ID’, select ‘Search & Enter’
- Alternatively, select the ‘3-dots' next to ‘Pay Vendor’ and then select ‘Enter PNI’
- Enter your vendor's PNI
- Select ‘Search’
- Select ‘Connect & Pay’
- Click on ‘Confirm’
If you don’t see the option to enter a PNI, you may already be connected or have a pending invite.
Check If You Are Already Connected
- Go to ‘Network’
- Click ‘Access Additional Network Features Here’
- Select ‘Connections’ to view your list
- If you are connected to the wrong PNI, you’ll need to disconnect first
To Disconnect An Old PNI:
- Go to ‘Vendors’
- Select the vendor’s name
- Click the three-dots next to ‘Pay Vendor’
- Choose ‘Disconnect’
- Confirm on the pop-up
Note: You won’t be able to disconnect if there are pending or scheduled payments. Wait for them to clear or cancel/void them if possible.
Check If There Is A Pending Invitation
- Go to ‘Network’
- Click ‘Access Additional Network Features Here’
- Select ‘Invites’ to see received, sent, and pending invitations
To Cancel A Pending Invite:
- Go to ‘Vendors’
- Select the vendor
- Click the three-dots next to ‘Pay Vendor’
If ‘Cancel Invite’ appears, click it or:
- Go to ‘Invites’
- Find the vendor
- Click ‘Cancel Invite’
Once you have entered the PNI and initiated the connection, here’s how to confirm that it has been successfully established:
A Payment Network ID (PNI) is a unique identifier that connects you to Bill.com’s payment network, enabling secure, streamlined transactions. To get the most out of this accounting software, make sure your PNI is entered correctly and shared with the right vendors and customers. This reduces manual errors, accelerates payment processing, and keeps your accounts payable workflows running smoothly.
If you are struggling with other Bill.com features or looking to optimize your billing process further, check out our guide on how to unapprove a bill in Bill.com.
