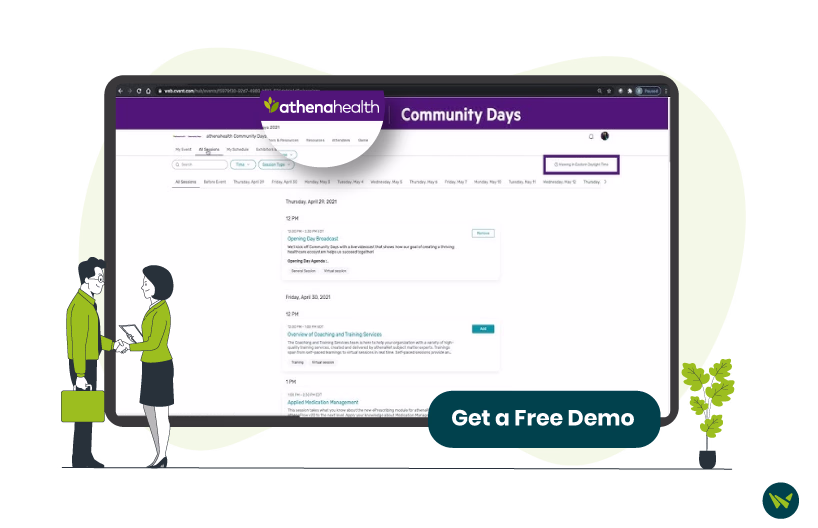
athenahealth is a leading name in the healthcare technology industry, serving over 6,750 customers worldwide and holding an impressive 23.29% share of the global EHR market. With its widespread adoption, many healthcare providers rely on athenahealth to schedule appointments.
If you're new to athenahealth, navigating the patient portal to book an appointment can initially feel overwhelming. Whether you're managing routine check-ups or specialized consultations, understanding how to schedule an appointment efficiently is essential.
This blog will guide you through entire process of scheduling an appointment in athena.
athenahealth offers two simple ways to schedule an appointment:
- athenahealth Patient Portal: Accessed through a web browser, allowing you to book and manage appointments online
- athenaPatient Mobile App: Available on Google Play and the Apple Store, providing a convenient way to schedule appointments from your smartphone anytime
Both options ensure easy and quick scheduling for patients.
Scheduling an appointment through the athenahealth Patient Portal is a straightforward process. Follow these step-by-step instructions to book your visit easily:
Step 1: Access The athenahealth Patient Portal
- After registering for the patient portal, you will receive an email from athenahealth with a ‘Create My Account’ link

- Click on the link and set up your account using the provided credentials
- Once your account is created, log in to the athenahealth Patient Portal
Step 2: Navigate To The Appointment Section
After logging in, click on the ‘Appointments’ tab on the left-hand side of your dashboard
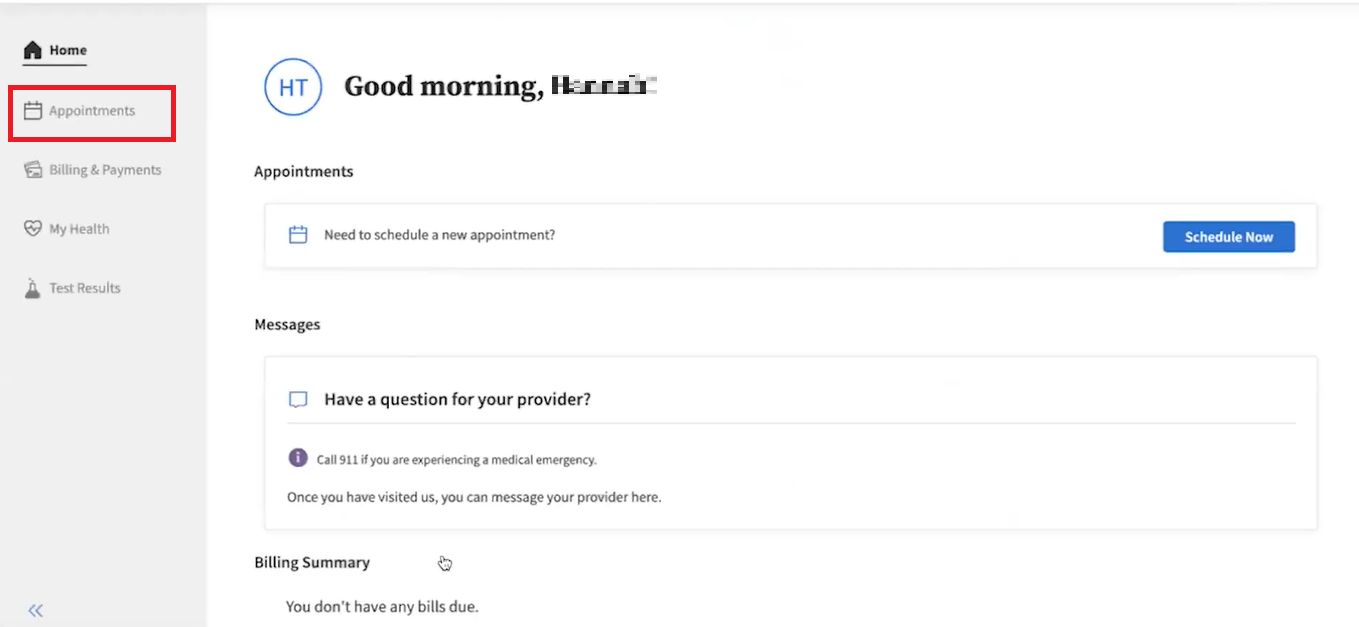
- Click on ‘Find Appointments’ to start the scheduling process

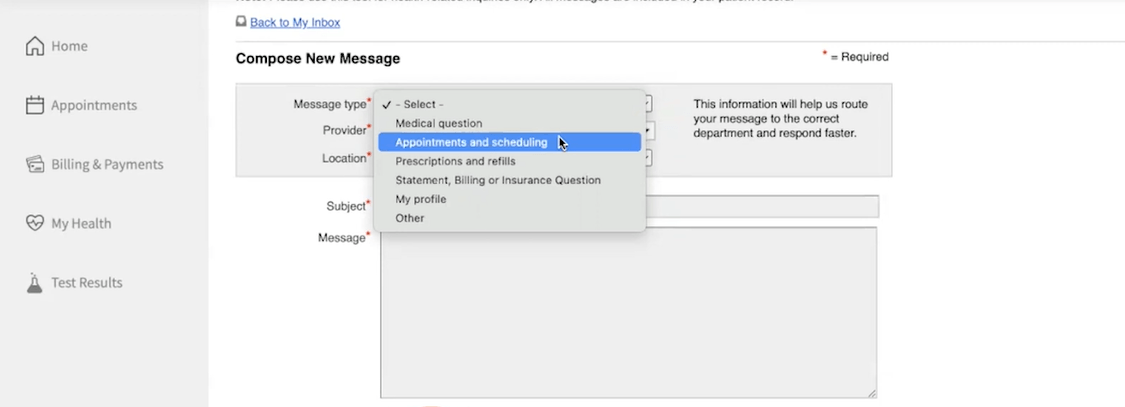
Step 3: Select Message Type
- Click on the ‘Message Type’ drop-down menu

- Choose ‘Appointments and Scheduling’ – this option allows you to schedule, update, or reschedule an appointment
Step 4: Choose Your Healthcare Provider
- Click on ‘Provider’ and select your desired healthcare professional from the available list
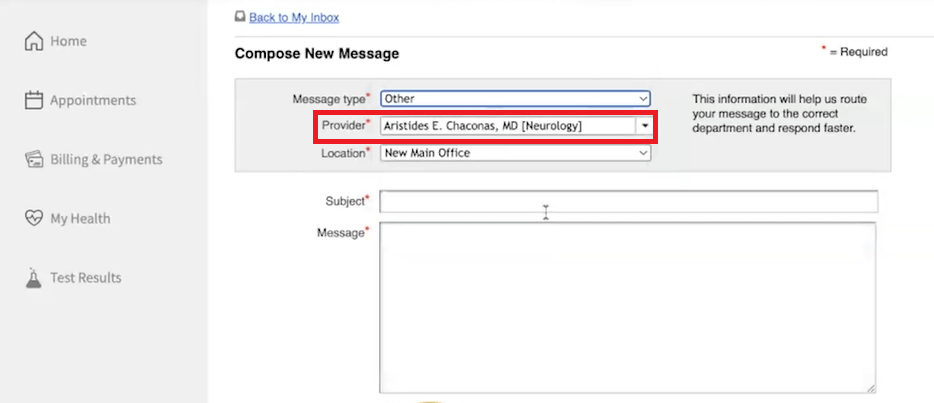
Step 5: Pick A Location
- Select the ‘Location’ field to choose the nearest clinic or hospital where you want your appointment
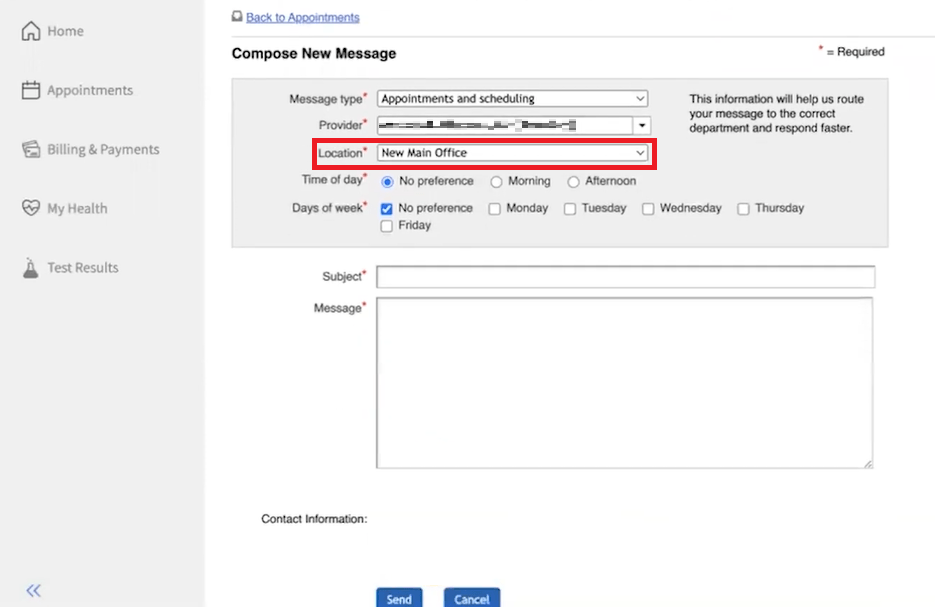
Step 6: Set Your Preferred Time And Day
- Under ‘Time of Day,’ choose one of the following options:
- No Preference
- Morning
- Afternoon

In the ‘Days of Week’ section, select your available day(s):
- No Preference
- Monday–Friday (Choose one or more days)
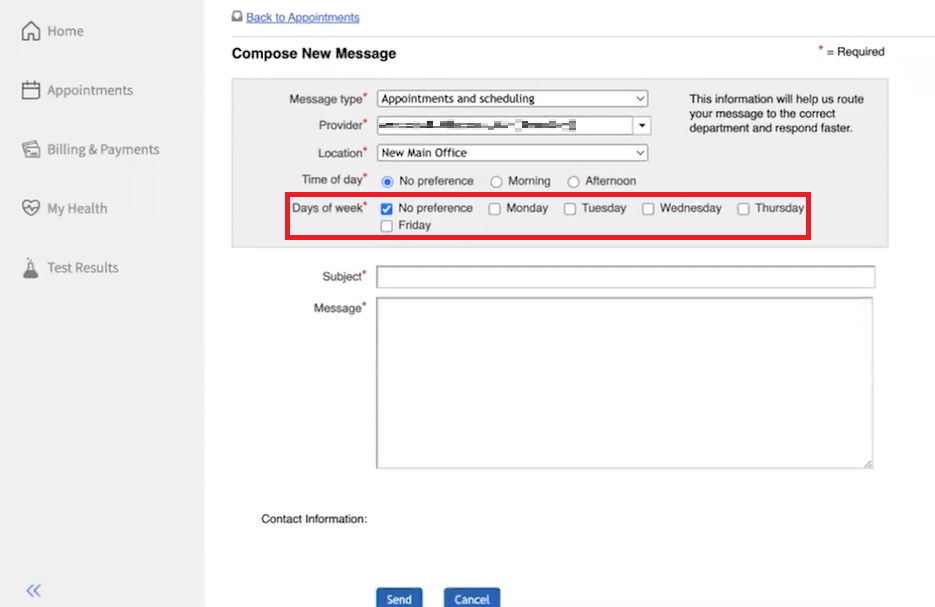
Note: You can select more than one option.
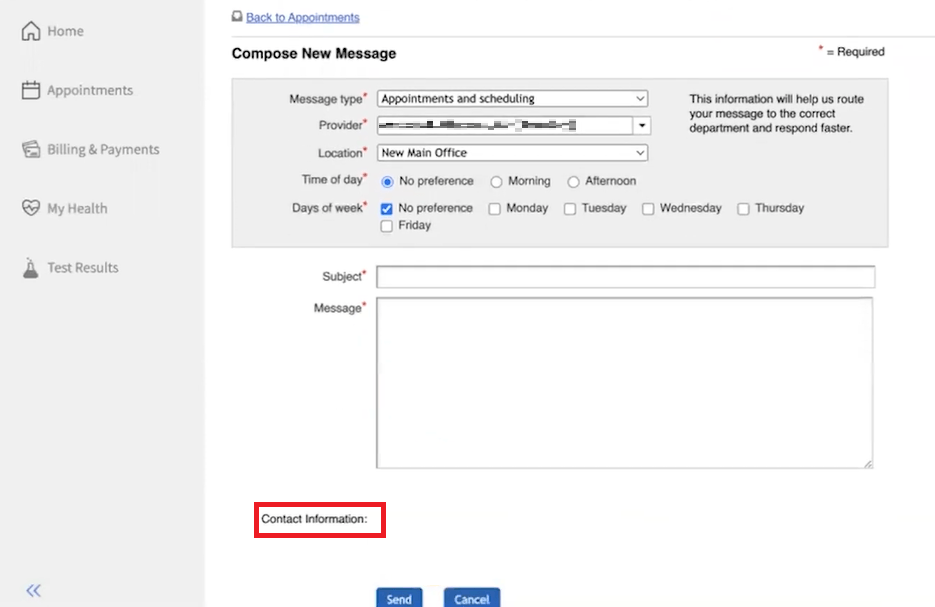
Step 7: Enter Appointment Details
- In the ‘Subject’ field, provide a brief reason for your appointment (e.g., Annual Check-Up)
- Use the ‘Message’ box to describe any specific concerns or additional information
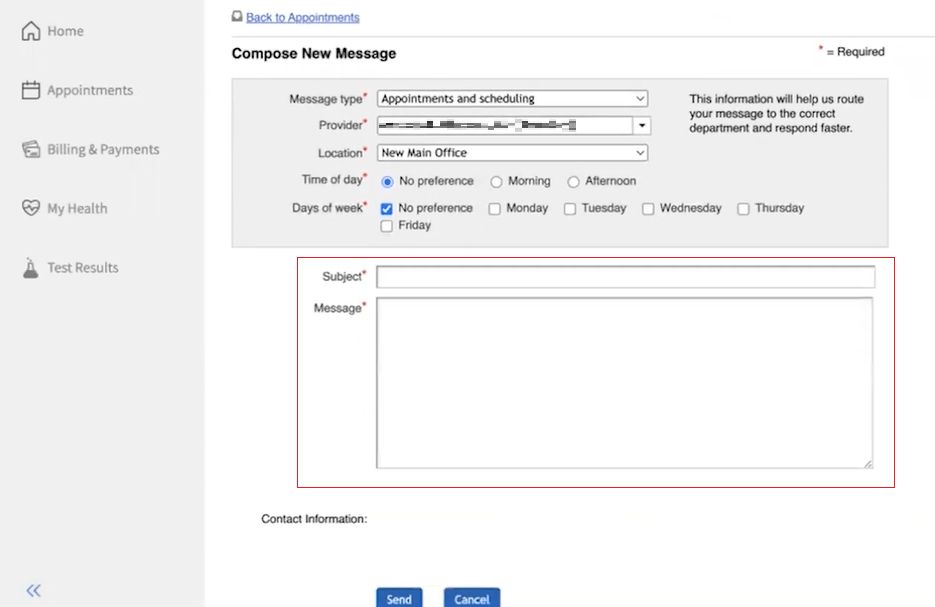
Step 8: Add Contact Information
- Fill out the ‘Contact Information’ section with your current phone number or email for appointment updates
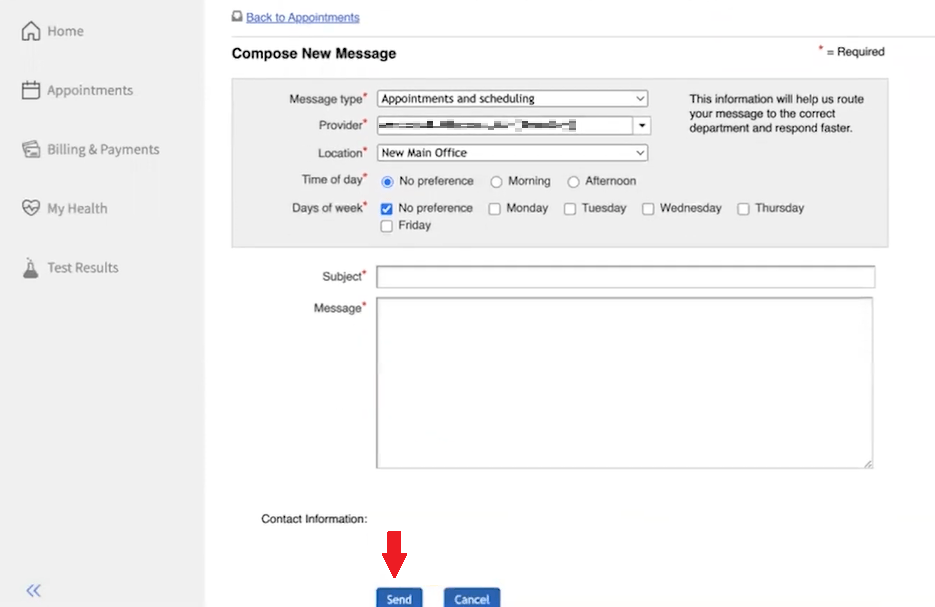
Step 9: Submit Your Appointment Request
- After reviewing your information, click the ‘Send’ button to forward your appointment request
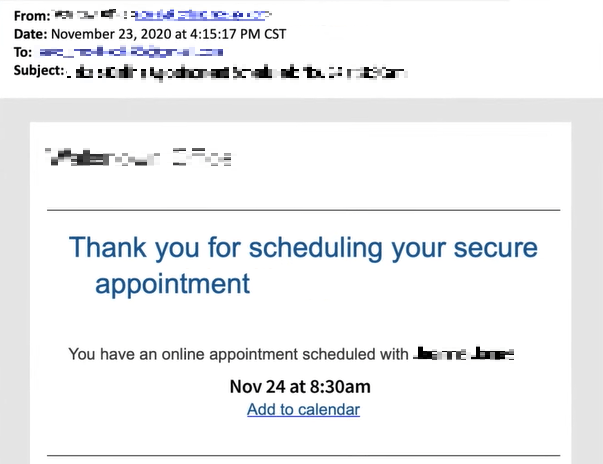
Step 10: Receive Confirmation
- Once your appointment scheduling request is processed, you will receive a confirmation email from athenahealth verifying that your appointment has been successfully scheduled
If your healthcare provider has enabled the self-scheduling feature, you can conveniently book an appointment through the athenaPatient mobile app. Follow these step-by-step instructions to schedule your visit:
Scheduling an appointment in athenahealth is simple whether you use the patient portal or the athenaPatient mobile app. You can efficiently book your visit by following the outlined steps (logging in, accessing the appointment section, and selecting your provider, location, and preferred time).
With these tools, you can conveniently manage your healthcare needs. Whether you prefer a desktop or a mobile device, athenahealth makes scheduling seamless and accessible. Follow these steps to schedule your appointments with ease.