When managing hourly teams, even one missed shift or scheduling error can ruin the entire day. Without the right scheduling system, it’s tough to keep tabs on who’s working, who’s off, and who might have swapped a shift at the last minute. When I Work is designed to make that easier for businesses with hourly teams.
It helps managers create schedules faster, handle time-off requests, track attendance, and communicate with staff without relying on scattered messages or manual spreadsheets. In short, it ensures optimal staffing coverage while minimizing repetitive administrative tasks.
If you’re just getting started with When I Work, this step-by-step guide will walk you through everything—from setting up your account to managing schedules, shifts, and team communication. Let’s get started!

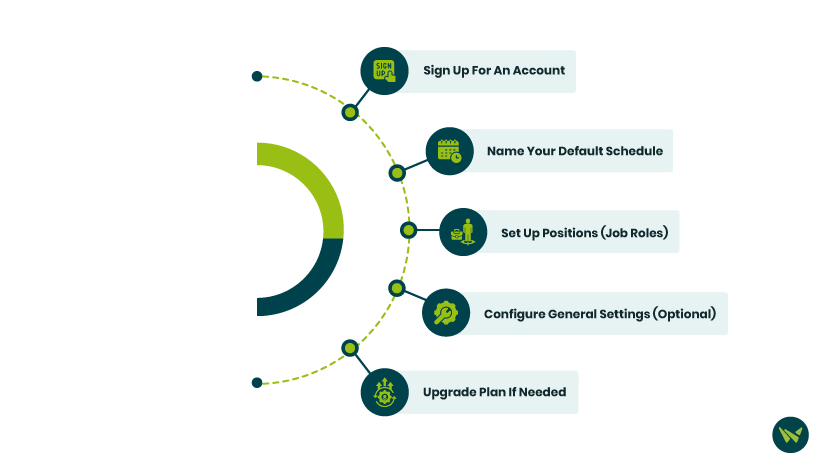
To begin using When I Work, you’ll need to create a manager or admin account and configure your workplace settings. This initial setup includes defining your schedules, roles, and general preferences:
- Sign Up For An Account: Head to When I Work login page and start with a free trial. During signup, enter your organization’s name to create a ‘Workplace’—this is your company’s space where you’ll manage staff and schedules (If you’ve been invited to an existing workplace, just accept the invite and log in)
- Name Your Default Schedule: Every new workplace begins with one default schedule. Rename it to something descriptive (e.g., ‘Main Store Schedule’). You can add more schedules later if you have multiple departments or locations
- Set Up Positions (Job Roles): Add job roles like ‘Cashier’, ‘Server’, or ‘Manager’ under ‘Positions’ settings. These tags help assign qualified staff to the right shifts and enable schedule filtering or template use based on roles
- Configure General Settings (Optional): In ‘Workplace’ or ‘General Settings’, adjust preferences like your time zone, week start day, and rules (such as max hours per employee or whether coworkers can view each other’s schedules). These settings help flag overtime or scheduling conflicts early
- Upgrade Plan If Needed: You’ll start on a free trial of the premium plan. If you want continued access to features like time tracking or payroll integration, you’ll need to upgrade. Admins can manage this under ‘Account & Billing’
Once your workplace is set up, you’re ready to add team members and start building your schedule. The following sections will walk you through employees, shifts, time-off requests, and more.
Your employees (or volunteers/staff) need to be added to your When I Work workplace so you can assign them shifts and they can view their schedules. You can invite employees individually, import a list of many employees, or allow self-sign-up (with approval). For beginners, adding and inviting users one at a time is straightforward.
Step-By-Step: Add Users Individually
Step 1: Open the ‘Users’ page
- On the When I Work web app, hover over the ‘Workplace’ menu (gear icon) on the left navigation bar and select ‘Users’. This opens your user directory, listing all employees in your workplace. You must have the proper manager or admin access level to manage users
Step 2: Create a ‘New User’
- Select the ‘Add’ button in the top-right corner to open the ‘Add User’ dialog
- Enter the employee’s ‘First Name’ and ‘Last Name’ (required) and add an ‘Email Address’ and/or ‘Mobile Number’ to send the invite. It’s best to include both, as a backup
- Optional fields include employee ID (useful for time clock/payroll export) and start date
Step 3: Assign roles, positions, and schedules
- In the ‘Add User’ dialog, set the person’s ‘Role’ (default is Employee) and assign them to the relevant ‘Positions’ and ‘Schedules’
- If they need manager or supervisor privileges, choose the appropriate role from the ‘User Role’ dropdown before saving
- Use the ‘Assignments’ tab to designate which schedule(s) and position(s) they belong to. For example, assign Jane Doe to the ‘Downtown Store’ schedule and set position to ‘Cashier’
Step 4: ‘Save’ and click ‘Send Invite’
- Click ‘Save User’ (or the checkmark ✔️ on the mobile app). If an email or phone number was provided, When I Work will prompt you to send an invitation, which triggers an email/text with a link to join your workplace
- Employees follow the link to set up a password or download the app
Tip: Let employees know to expect an invite from When I Work so they don’t miss it.
Once accepted, they can log in via web or mobile to view schedules, clock in, and more.
Alternative Options
After adding your team members, you’ll see them listed in the ‘Users’ list. Each person’s status will show as ‘Invited’ (pending them joining) or ‘Active’. Now you’re ready to start scheduling shifts for your staff.

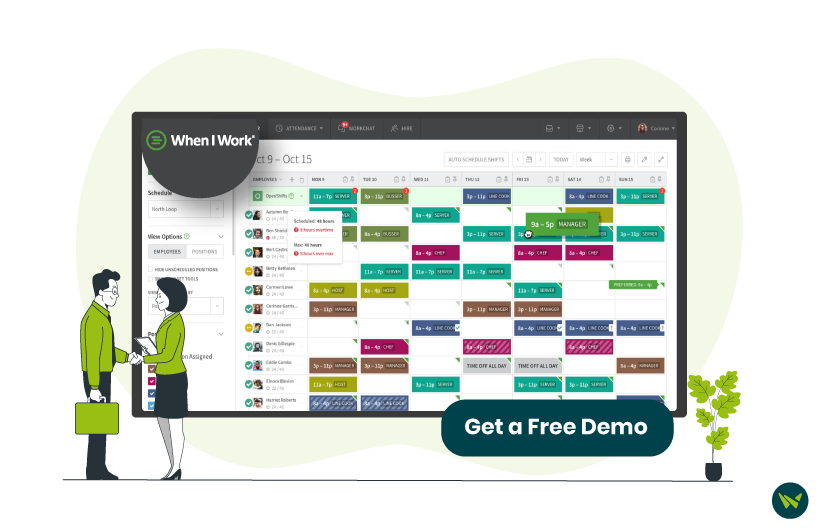
Scheduling is the core of When I Work. The ‘Scheduler’ is a calendar interface where you assign shifts to employees and then publish the schedule, so everyone gets notified. When I Work’s scheduling tool is flexible – you can create one-time shifts or repeating templates, offer shifts for pickup, etc. Here we’ll cover the basics of building a weekly schedule and publishing it to your team:
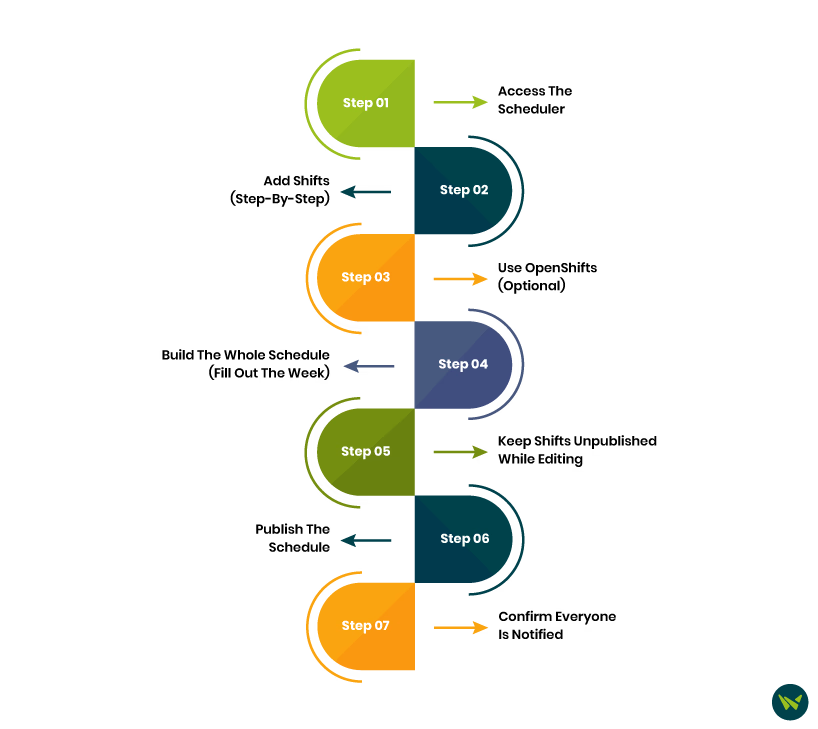
Step 1: Access The Scheduler
- In the web app, click the ‘Scheduler’ tab in the top navigation bar. You’ll see the calendar view of the current schedule (by default, in Week view). On the left side, you have a list of employees (or positions, depending on view settings), and along the top, the dates
- Ensure you have the correct schedule selected if you have multiple (use the ‘Schedule’ dropdown or tabs to switch between, e.g. ‘Downtown’ vs ‘Uptown’ location)
- You can toggle the view by day, week, or month using the view menu at the top right, but ‘Week View’ is most common for managers to plan a full week at a glance
Step 2: Add Shifts (Step-By-Step)
- To create a shift, click ‘+’ on the calendar cell under a date and next to an employee’s name. A shift details popup will appear where you can set the time or assign a position
- Enter the shift start and end time and confirm the assigned ‘Position’ (if your workplace uses positions like Server, Manager, etc.). By default, the shift is assigned to the employee whose row you clicked (you can change the user in the shift edit dialog if needed). You can also add any notes or break details to the shift
- For faster scheduling, you might want to create reusable ‘Shift Templates’ for common shift times (e.g., an ‘Morning 9am–1pm’ shift). Shift Templates can be made by clicking the templates icon (clipboard symbol) or via the Shift Templates menu; once saved, you can drag or click to apply them without retyping
Step 3: Use OpenShifts (Optional)
- If you have shifts that aren’t pre-assigned to a person, you can create OpenShifts. In the ‘Scheduler’, the top row labeled ‘OpenShifts’ is for this purpose. For example, if you need an extra shift on ‘Friday 5 to 9 PM’ so that any qualified employee can volunteer to work, add it as an ‘OpenShift’. Eligible employees will see it and can request to take it, subject to manager approval. This gives flexibility and empowers staff to fill gaps
Note: Make sure to specify a position for an OpenShift so that only employees with that position can pick it up, if applicable.
Step 4: Build The Whole Schedule (Fill Out The Week)
- Continue adding shifts for each day and each employee until the week’s schedule is complete. You can drag and drop shifts to different days or employees as needed—just note that drag and drop is not available in ‘Month view’
- When I Work will automatically highlight any obvious conflicts – for instance, if someone is double-booked at overlapping times or exceeds a set maximum hour, you’ll see warnings
- Take advantage of features like copying last week’s schedule or using ‘Auto-Scheduling’ if you have a regular schedule; these can speed up the process by replicating shift patterns. (Auto-Scheduling uses an algorithm to assign shifts based on roles and availability – useful once you have preferences set – but as a beginner you can start with manual scheduling)
Step 5: Keep Shifts Unpublished While Editing
- Initially, any new shifts you add are unpublished (usually shown with diagonal stripes or a draft status). Unpublished shifts are invisible to employees. This is good because you can make all your changes and finalize the schedule before notifying the team
Step 6: Publish The Schedule
- When your schedule for the week (or whatever period you’ve prepared) is finalized, click the ‘Save & Publish’ button
- You’ll be prompted to select which date range to publish (e.g. ‘Entire schedule’ for the whole week or specific days). ‘Confirm’, and When I Work will send push notifications, emails, or text alerts to employees about their new shifts, according to their notification preferences
- Once published, shifts will appear as solid blocks on your calendar (no stripes) indicating employees can now see them
Note: If you realize you need to tweak something after publishing, you can still adjust shifts; just note that changes will trigger update notifications to the affected employees.
Step 7: Confirm Everyone Is Notified
- After publishing, it’s good practice to check that all employees have acknowledged their shifts. When I Work has a ‘Scheduler Confirmations’ feature where employees can confirm receipt of their assigned shifts
Pro Tips: To avoid rebuilding schedules from scratch every week, explore ‘Schedule Templates’ and ‘Auto-Scheduling’ once you’ve done an initial schedule. You can save the current week as a template and then load it for future weeks, then just make minor edits. Also, use the filtering and view options on the ‘Scheduler’ (left sidebar) to simplify your view – for example, filter by position to ensure each role is covered each day, or hide employees who have no shifts to reduce clutter.
Instead of relying on separate emails or texts, you can use ‘WorkChat’—an instant messaging feature within When I Work that supports real-time one-on-one and group chats. It functions like a dedicated work chat app, allowing all employees to communicate without sharing personal phone numbers. As a manager, you can use it to send a quick message to an individual (‘Can you come in 1 hour early today?’) or to groups/channels (for example, a channel for the Kitchen Staff or an all-team channel for announcements).
Once you complete these steps, you’ll have your team up and running on When I Work. If you ever run into questions or encounter any other issues, check out When I Work’s official ‘Help Center’ articles or reach out to us for additional support.
